Connectors
Link your platforms or subscribe to content you care about — OpenLoomi keeps watch so you don't have to.
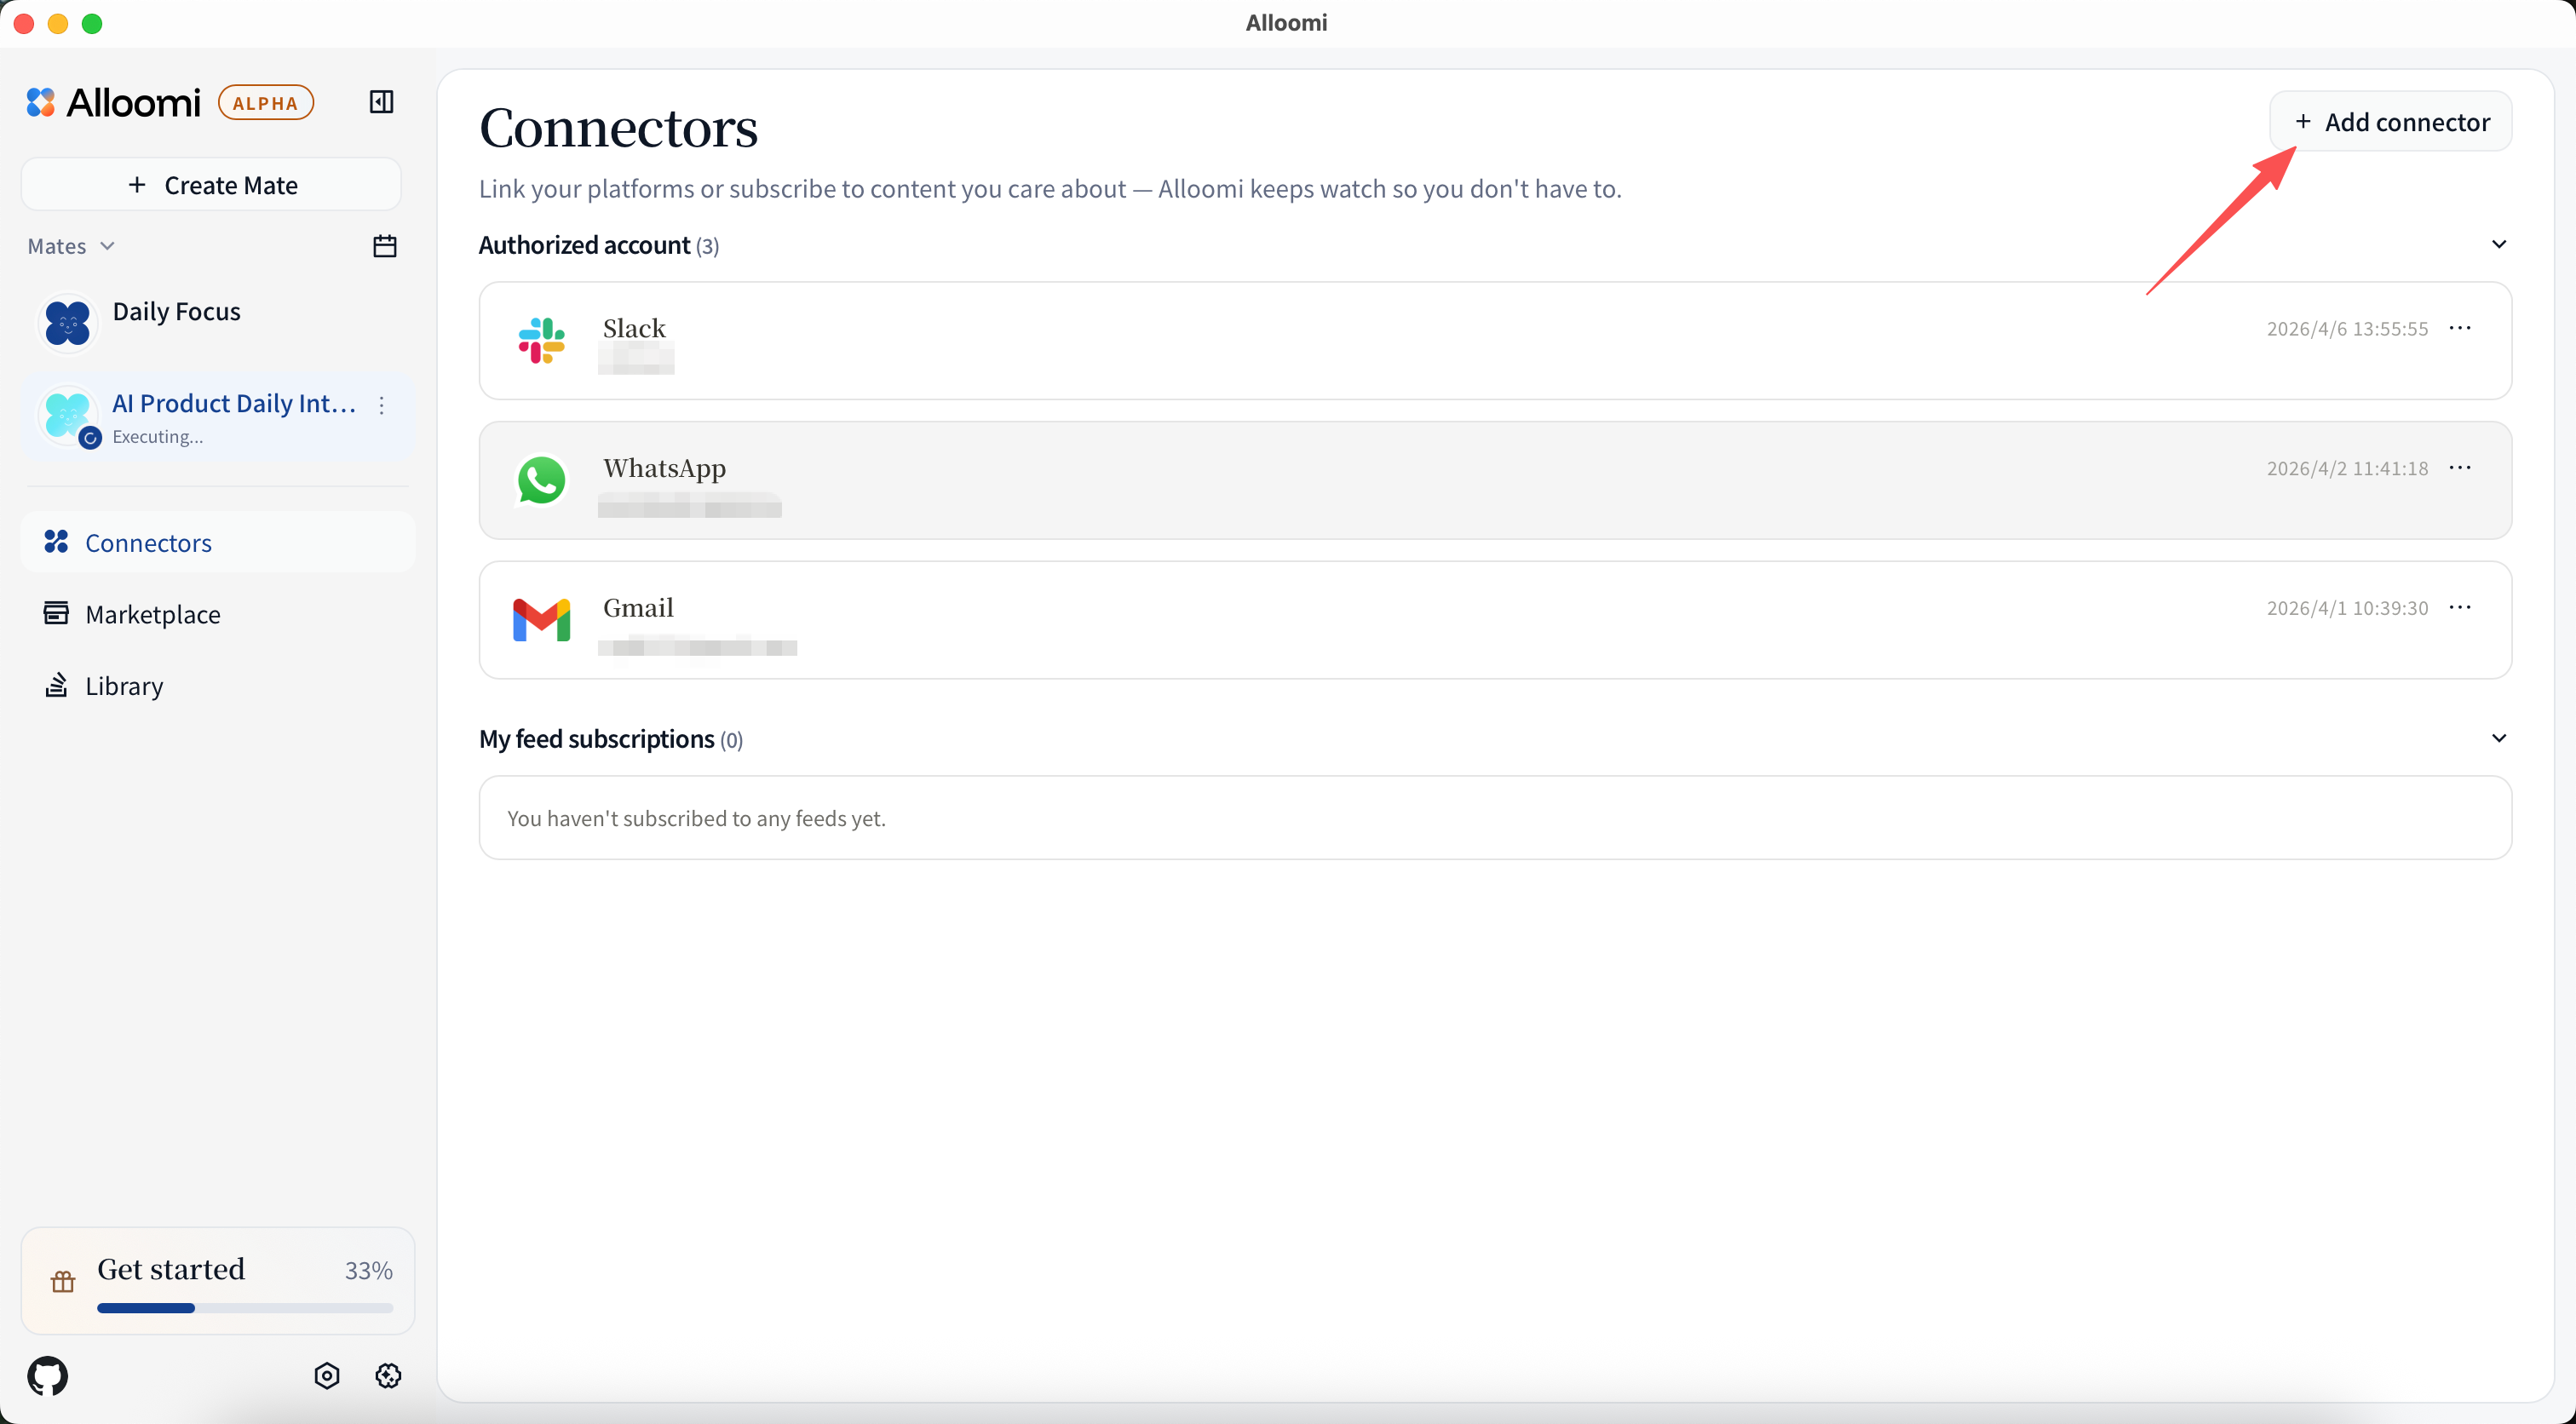
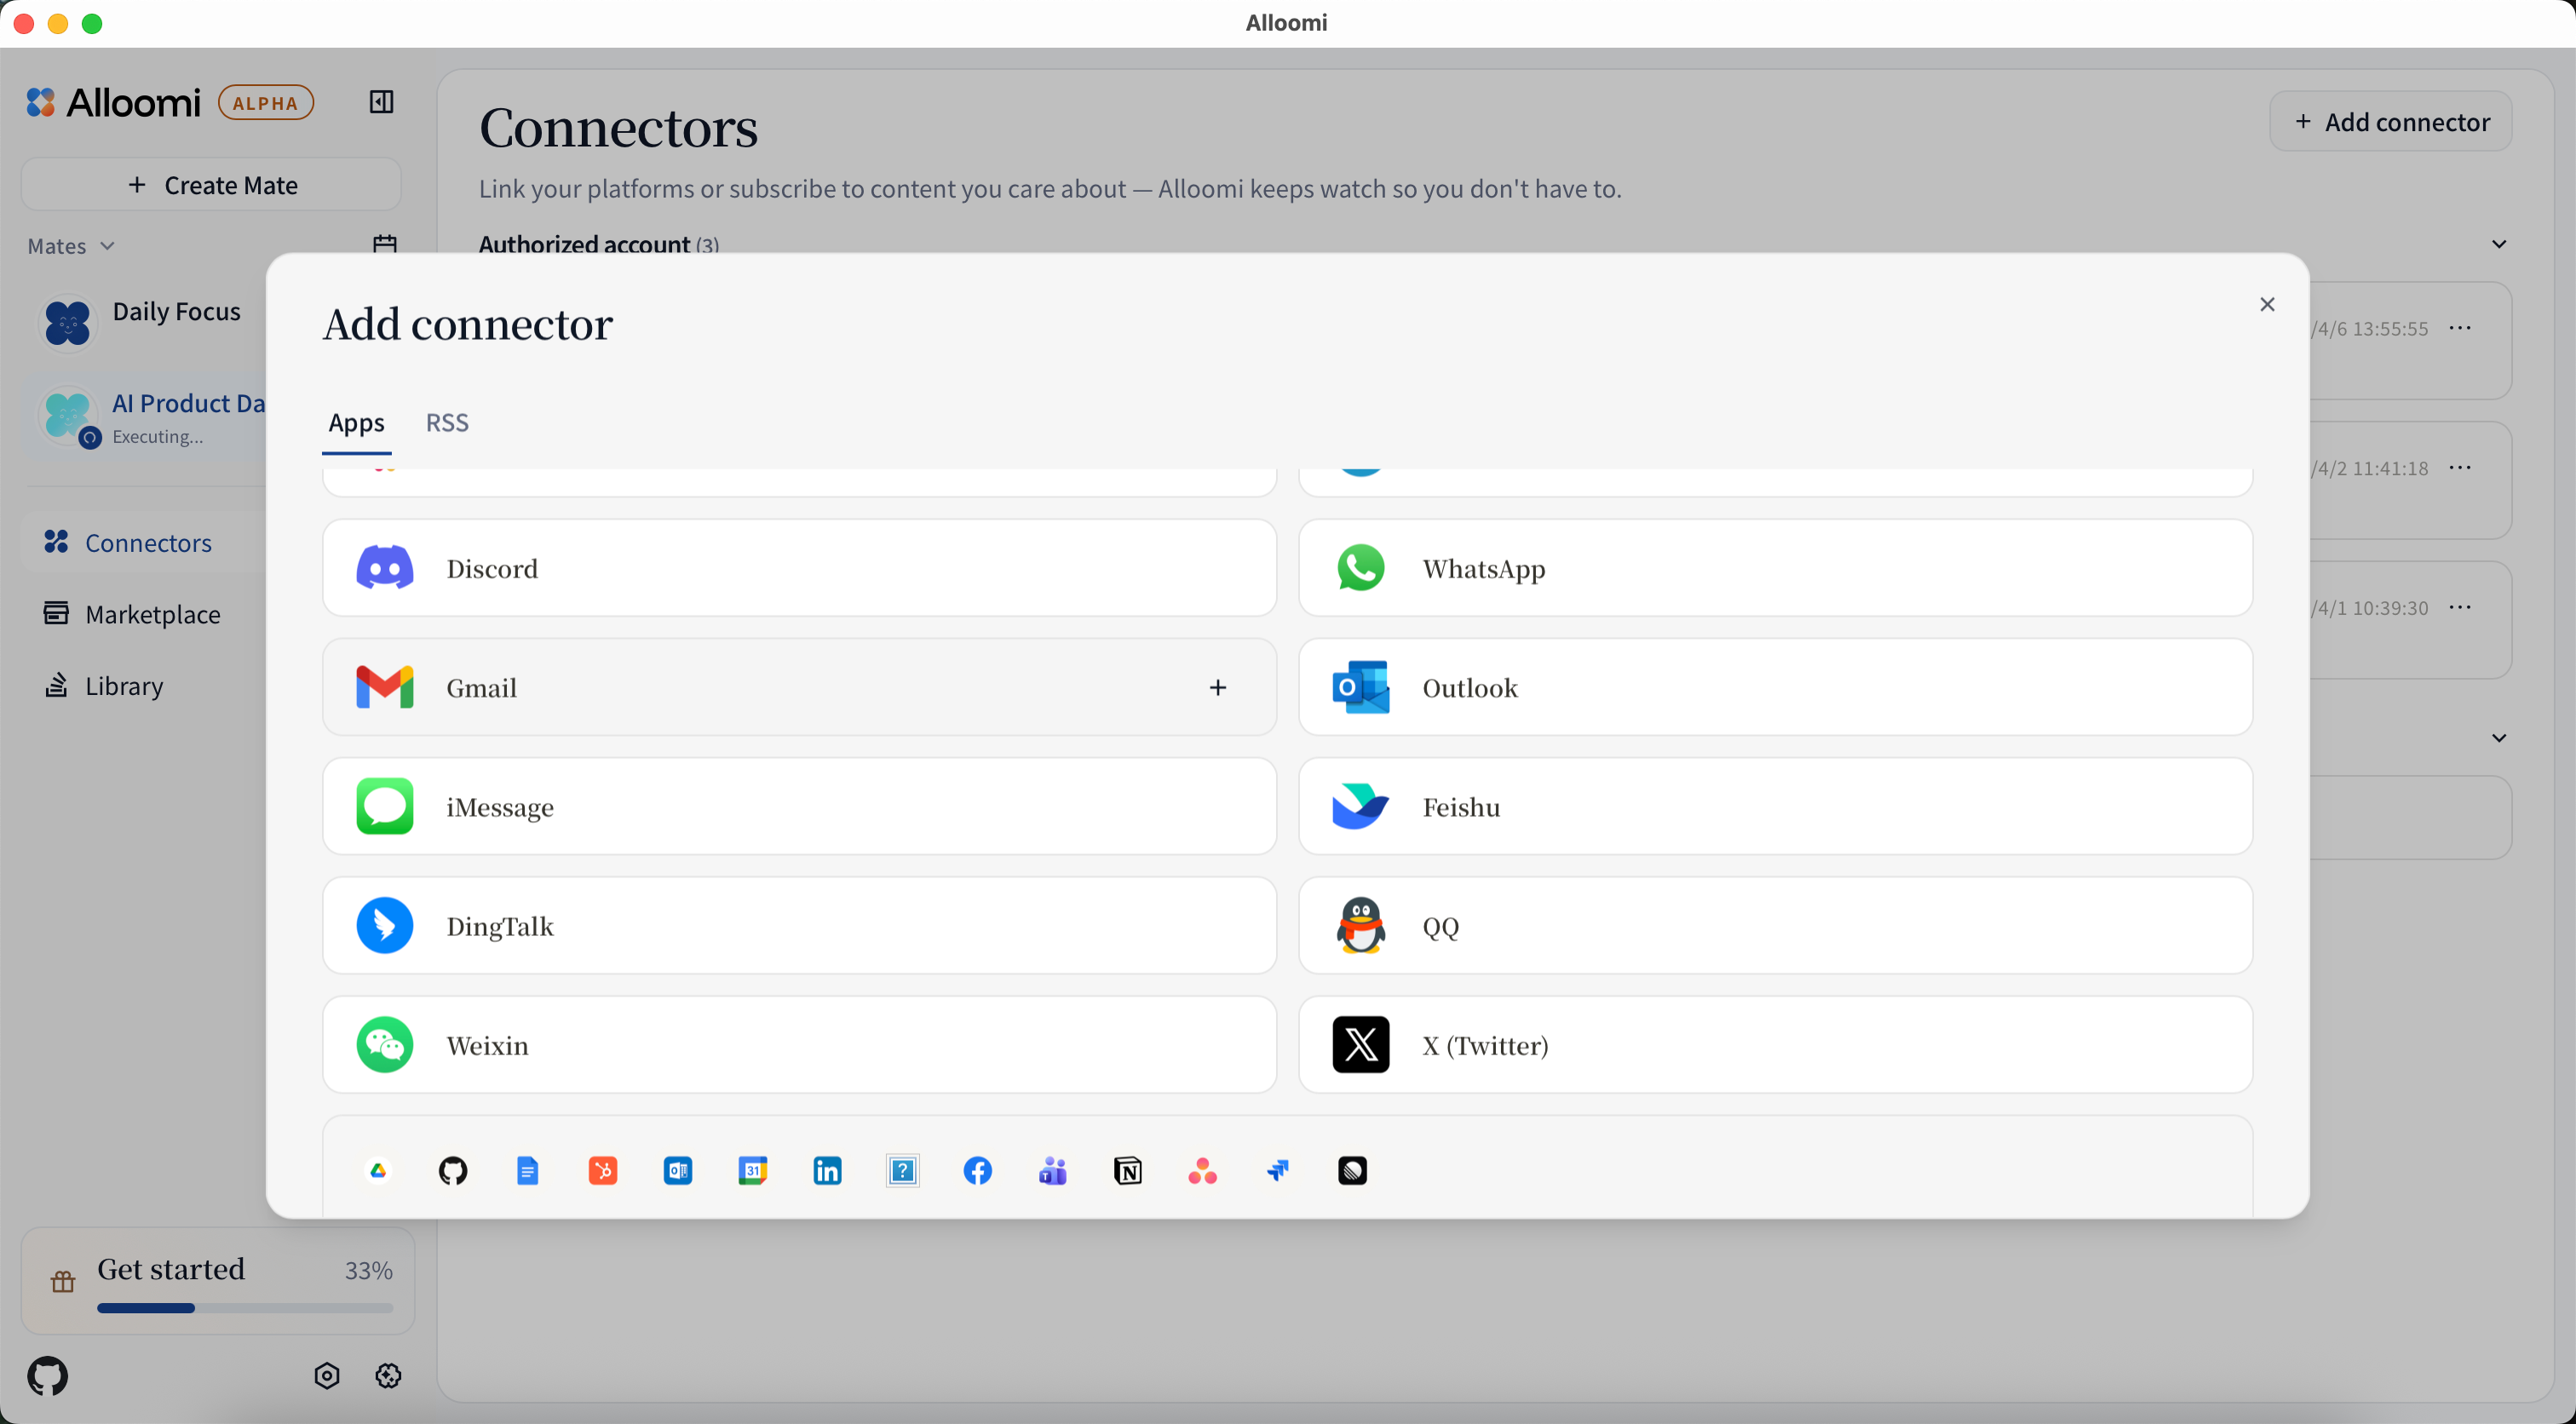
To add a connector, open Settings → Connectors and click + Add New Connector. OpenLoomi will guide you through the authorization process for each platform.
🔒 Privacy by design: OpenLoomi only reads messages to generate insights. It does not store raw message content on its servers — data is processed locally or encrypted in transit.
📋 Status table accuracy. The status column below is the source of truth for what's actually wired up in
apps/web/components/add-platform-dialog.tsx. Several platforms the doc previously listed as "🟢 Available" are currently disabled (disable: true) in the Add Connector dialog. If a platform you need is grayed out there, that matches this table.
Supported Platforms
Messaging Platforms and Social Media
| Platform | Status | Description |
|---|---|---|
| Telegram | 🟢 Available | Personal messaging |
| 🟢 Available | Personal messaging | |
| iMessage | 🟢 Available | Personal messaging (macOS only) |
| 🟢 Available | Bot messaging | |
| Lark/Feishu | 🟢 Available | Bot messaging |
| DingTalk | 🟢 Available | Bot messaging |
| Weixin | 🟢 Available | Bot messaging |
| Gmail | 🟢 Available | |
| Outlook | 🟢 Available |
Powered by Composio
The productivity connectors above (Google Calendar, Google Docs, Google Drive, HubSpot, Notion, GitHub, Asana, Jira, Linear, and Outlook Calendar) authorize through Composio, a hosted OAuth broker. You don't add a "Composio" connector directly — you pick the platform you want, and OpenLoomi routes the authorization through Composio behind the scenes.
What's different about the Composio flow:
- Authorization opens in your system browser, not the OpenLoomi app window. This is expected — Composio hosts the OAuth handshake with the target platform (Google, HubSpot, etc.).
- Your identity is carried securely across the popup. Because the system browser's session is separate from the app's session, OpenLoomi passes an encrypted
statetoken through the flow and binds the resulting connection back to your account when you return to the app. - Connections are managed per account. Once authorized, the connector appears in Settings → Connectors like any other, and you can disconnect it there.
💡 The messaging connectors (Telegram, WhatsApp, iMessage, Feishu, DingTalk, QQ, WeChat) and email (Gmail, Outlook) do not use Composio — they connect through their own native flows (QR / phone / bot token / app password) documented below.
What Each Connector Does
The table below compares what each connector supports across key capabilities. Use this to choose the right platform for your workflow.
Note: Slack, Discord, X, Microsoft Teams, Google Drive, GitHub, Notion, and the rest of the platforms shown in the status table as 🔒 Disabled are not yet wired up in the Add Connector dialog. This capability matrix only lists the platforms currently available.
Messaging Platforms
| Connector | Read Messages | Send / Reply | Interactive Chat | AI Translation | AI Polishing | Notes & Files | Setup |
|---|---|---|---|---|---|---|---|
| Telegram | ✅ | ✅ | ✅ | ✅ | ✅ | ✅ | QR / Phone |
| ✅ | ✅ | ✅ | ✅ | ✅ | ✅ | QR / Phone | |
| iMessage | ✅ | ✅ | ✅ | ✅ | ✅ | ✅ | Local (macOS) |
| ⚠️ | ✅ | ✅ | ✅ | ❌ | ❌ | Bot Token | |
| Lark/Feishu | ⚠️ | ✅ | ✅ | ✅ | ❌ | ❌ | Bot Token |
| DingTalk | ⚠️ | ✅ | ✅ | ✅ | ❌ | ❌ | Bot Token |
| Weixin | ❌ | ❌ | ✅ | ❌ | ❌ | ❌ | QR |
| Connector | Read Messages | Send / Reply | Interactive Chat | AI Translation | AI Polishing | Notes & Files | Setup |
|---|---|---|---|---|---|---|---|
| Gmail | ✅ | ✅ | ❌ | ✅ | ✅ | ✅ | App Password |
| Outlook | ✅ | ✅ | ❌ | ✅ | ✅ | ✅ | App Password |
Trust Ladder: How Access Is Earned
OpenLoomi does not ask you to connect every system before it has earned the right to. The default is narrow: one integration, read-only, observation mode, with every extracted commitment or state transition shown alongside its source. Additional sources and write actions are unlocked only after the system has been demonstrably correct on the narrow surface.
Read one source
   ↓
Explain every extraction (commitment, decision, supersession)
   ↓
User corrects mistakes
   ↓
Observe reliability for two weeks
   ↓
Add another source
   ↓
Enable limited write actions (create task, sync deadline, send reply)
The three rules that make this work in practice:
- Narrow by default. Onboarding starts with the single source you trust most — often one Slack workspace or one GitHub repository. Other connectors are off until you turn them on.
- Show the work, not just the conclusion. Every extracted commitment is presented with the original message, the supersession evidence (if any), and a confidence score. If the system isn't sure a later message supersedes an earlier one, it asks you to confirm rather than silently updating state.
- Permissions are state, not just an OAuth click. OpenLoomi tracks which source a memory came from, which workspace or project it can travel into, and when the grant was made. Revoking a connector immediately stops new ingestion; previously synced data is retained until you explicitly delete it.
💡 A trustworthy AI co-worker should be able to answer, for any claim it makes: what it knows, where it learned it, what changed, and what it is not allowed to access. See Memory → Commitment Lifecycle for how this surfaces in the data model.
Authorization Modes Explained
OpenLoomi supports two distinct authorization modes for messaging platforms. Understanding the difference helps you choose the right platform for your workflow.
Bot Token Mode — Feishu, DingTalk, QQ
These platforms use enterprise self-built applications with bot credentials (App ID + App Secret or Client ID + Client Secret).
| Platform | Credentials | Message Source | How Users Trigger AI |
|---|---|---|---|
| Feishu | App ID + Secret | Messages sent directly to bot or @bot in group | Find bot → private chat, or @mention bot in group |
| DingTalk | Client ID + Secret | Messages sent directly to bot or @bot in group | Find bot → private chat, or @mention bot in group |
| App ID + Token | Messages sent directly to bot or @bot in group | Find bot → private chat, or @mention bot in group |
How it works: You create a bot app on the platform, obtain credentials, and connect it to OpenLoomi. Users can either:
- Find your bot in the messaging app and send messages directly to it (private chat)
- Add the bot to a group and @mention it — the bot will respond to messages directed at it
⚠️ Group chat requires @mention: In group chats, the bot only reacts when explicitly @mentioned. It cannot passively read all group messages.
User Account Mode — Telegram, WhatsApp
These platforms connect to a user's personal account via QR code or phone verification.
| Platform | Login Method | Message Source | How Users Trigger AI |
|---|---|---|---|
| Telegram | QR code / Phone | Saved Messages (user messages themselves) | Send message to yourself |
| QR code / Pair code | All personal account chats | Send message to yourself |
How it works: After logging into your personal account, OpenLoomi reads messages sent to your own account (Saved Messages / 自己发给自己). When you send a message to yourself, OpenLoomi reads it, generates an AI response, and you continue the conversation in the same chat.
Key Differences
| Bot Token Mode | User Account Mode | |
|---|---|---|
| Authorization | App credentials (App ID + Secret) | Personal account login (QR / phone) |
| Message scope | Only messages sent to the bot | All messages in the personal account |
| User interaction | User must find and chat with bot | User chats with their own account |
| Proactive monitoring | ❌ Bot can only respond to incoming messages | ✅ AI monitors Saved Messages / self-chats |
| Use case | Customer support bots, team assistants | Personal AI assistant, self-productivity |
💡 Tip: Bot Token mode is ideal for building customer-facing bots where users主动来找 bot. User Account mode is designed for personal AI assistants where you send notes to yourself and get AI-powered insights back.
How to
Platform Setup Details
Telegram
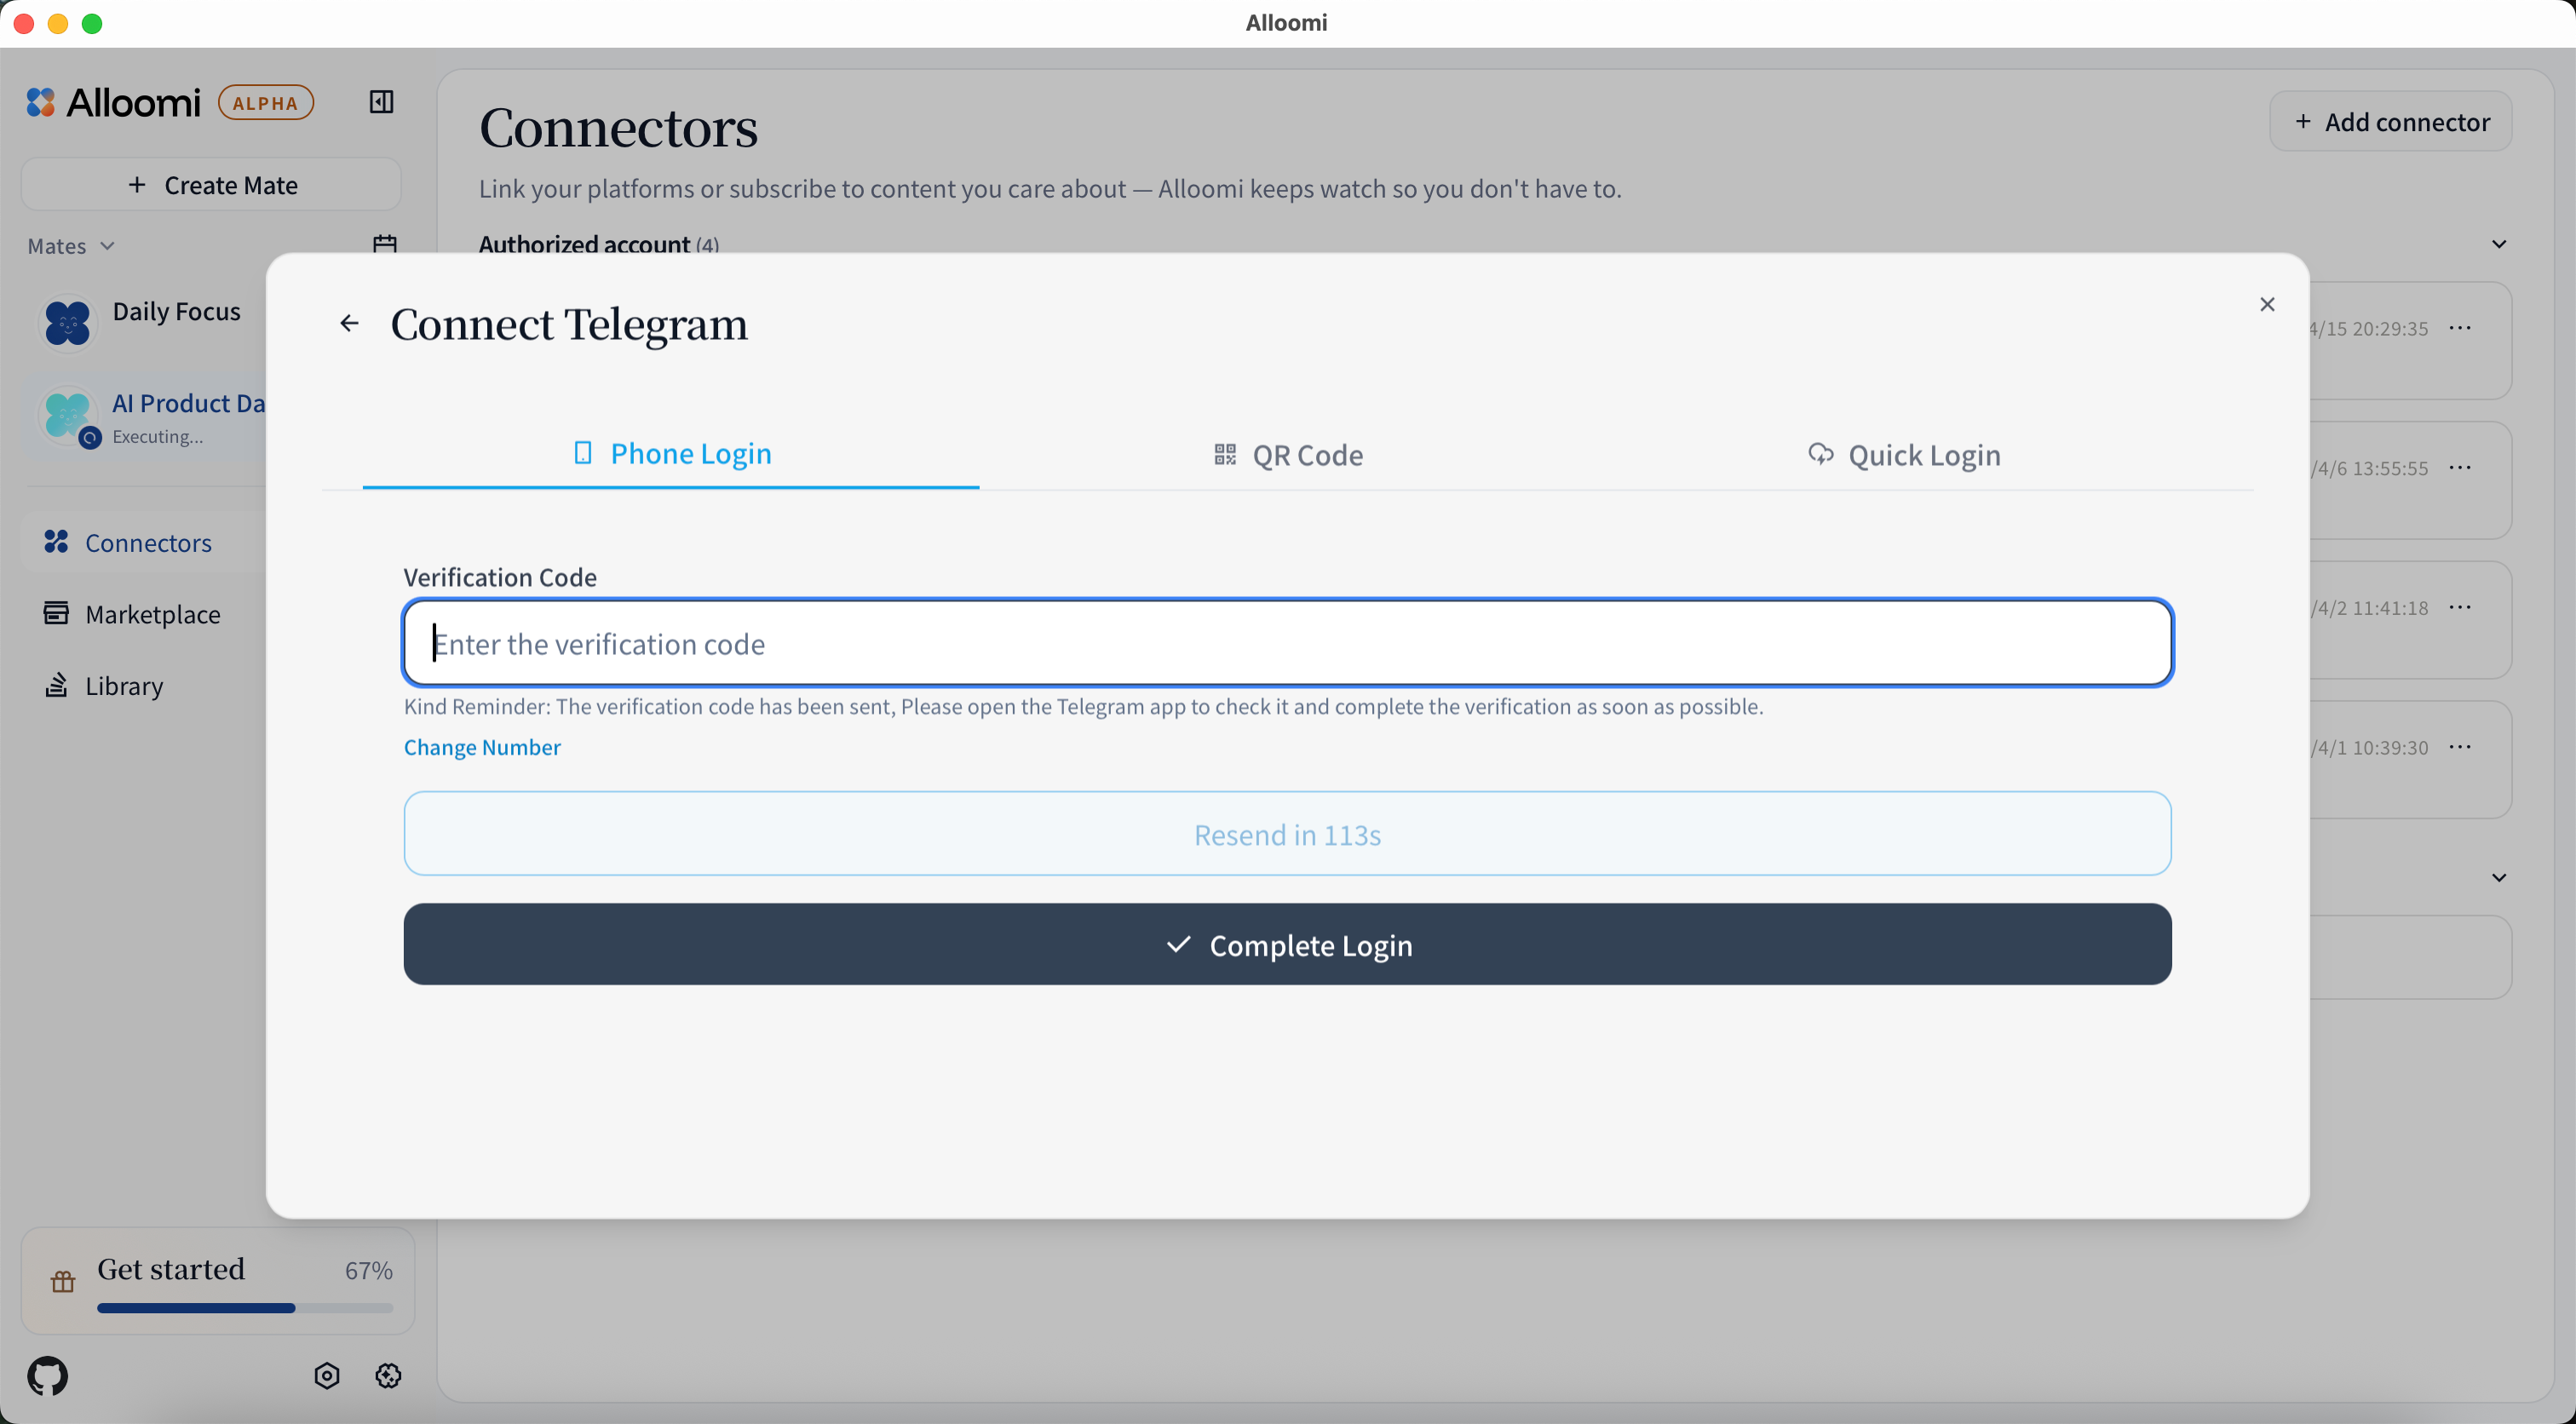
After clicking [Connect Telegram], you'll be redirected to Telegram's authorization page.
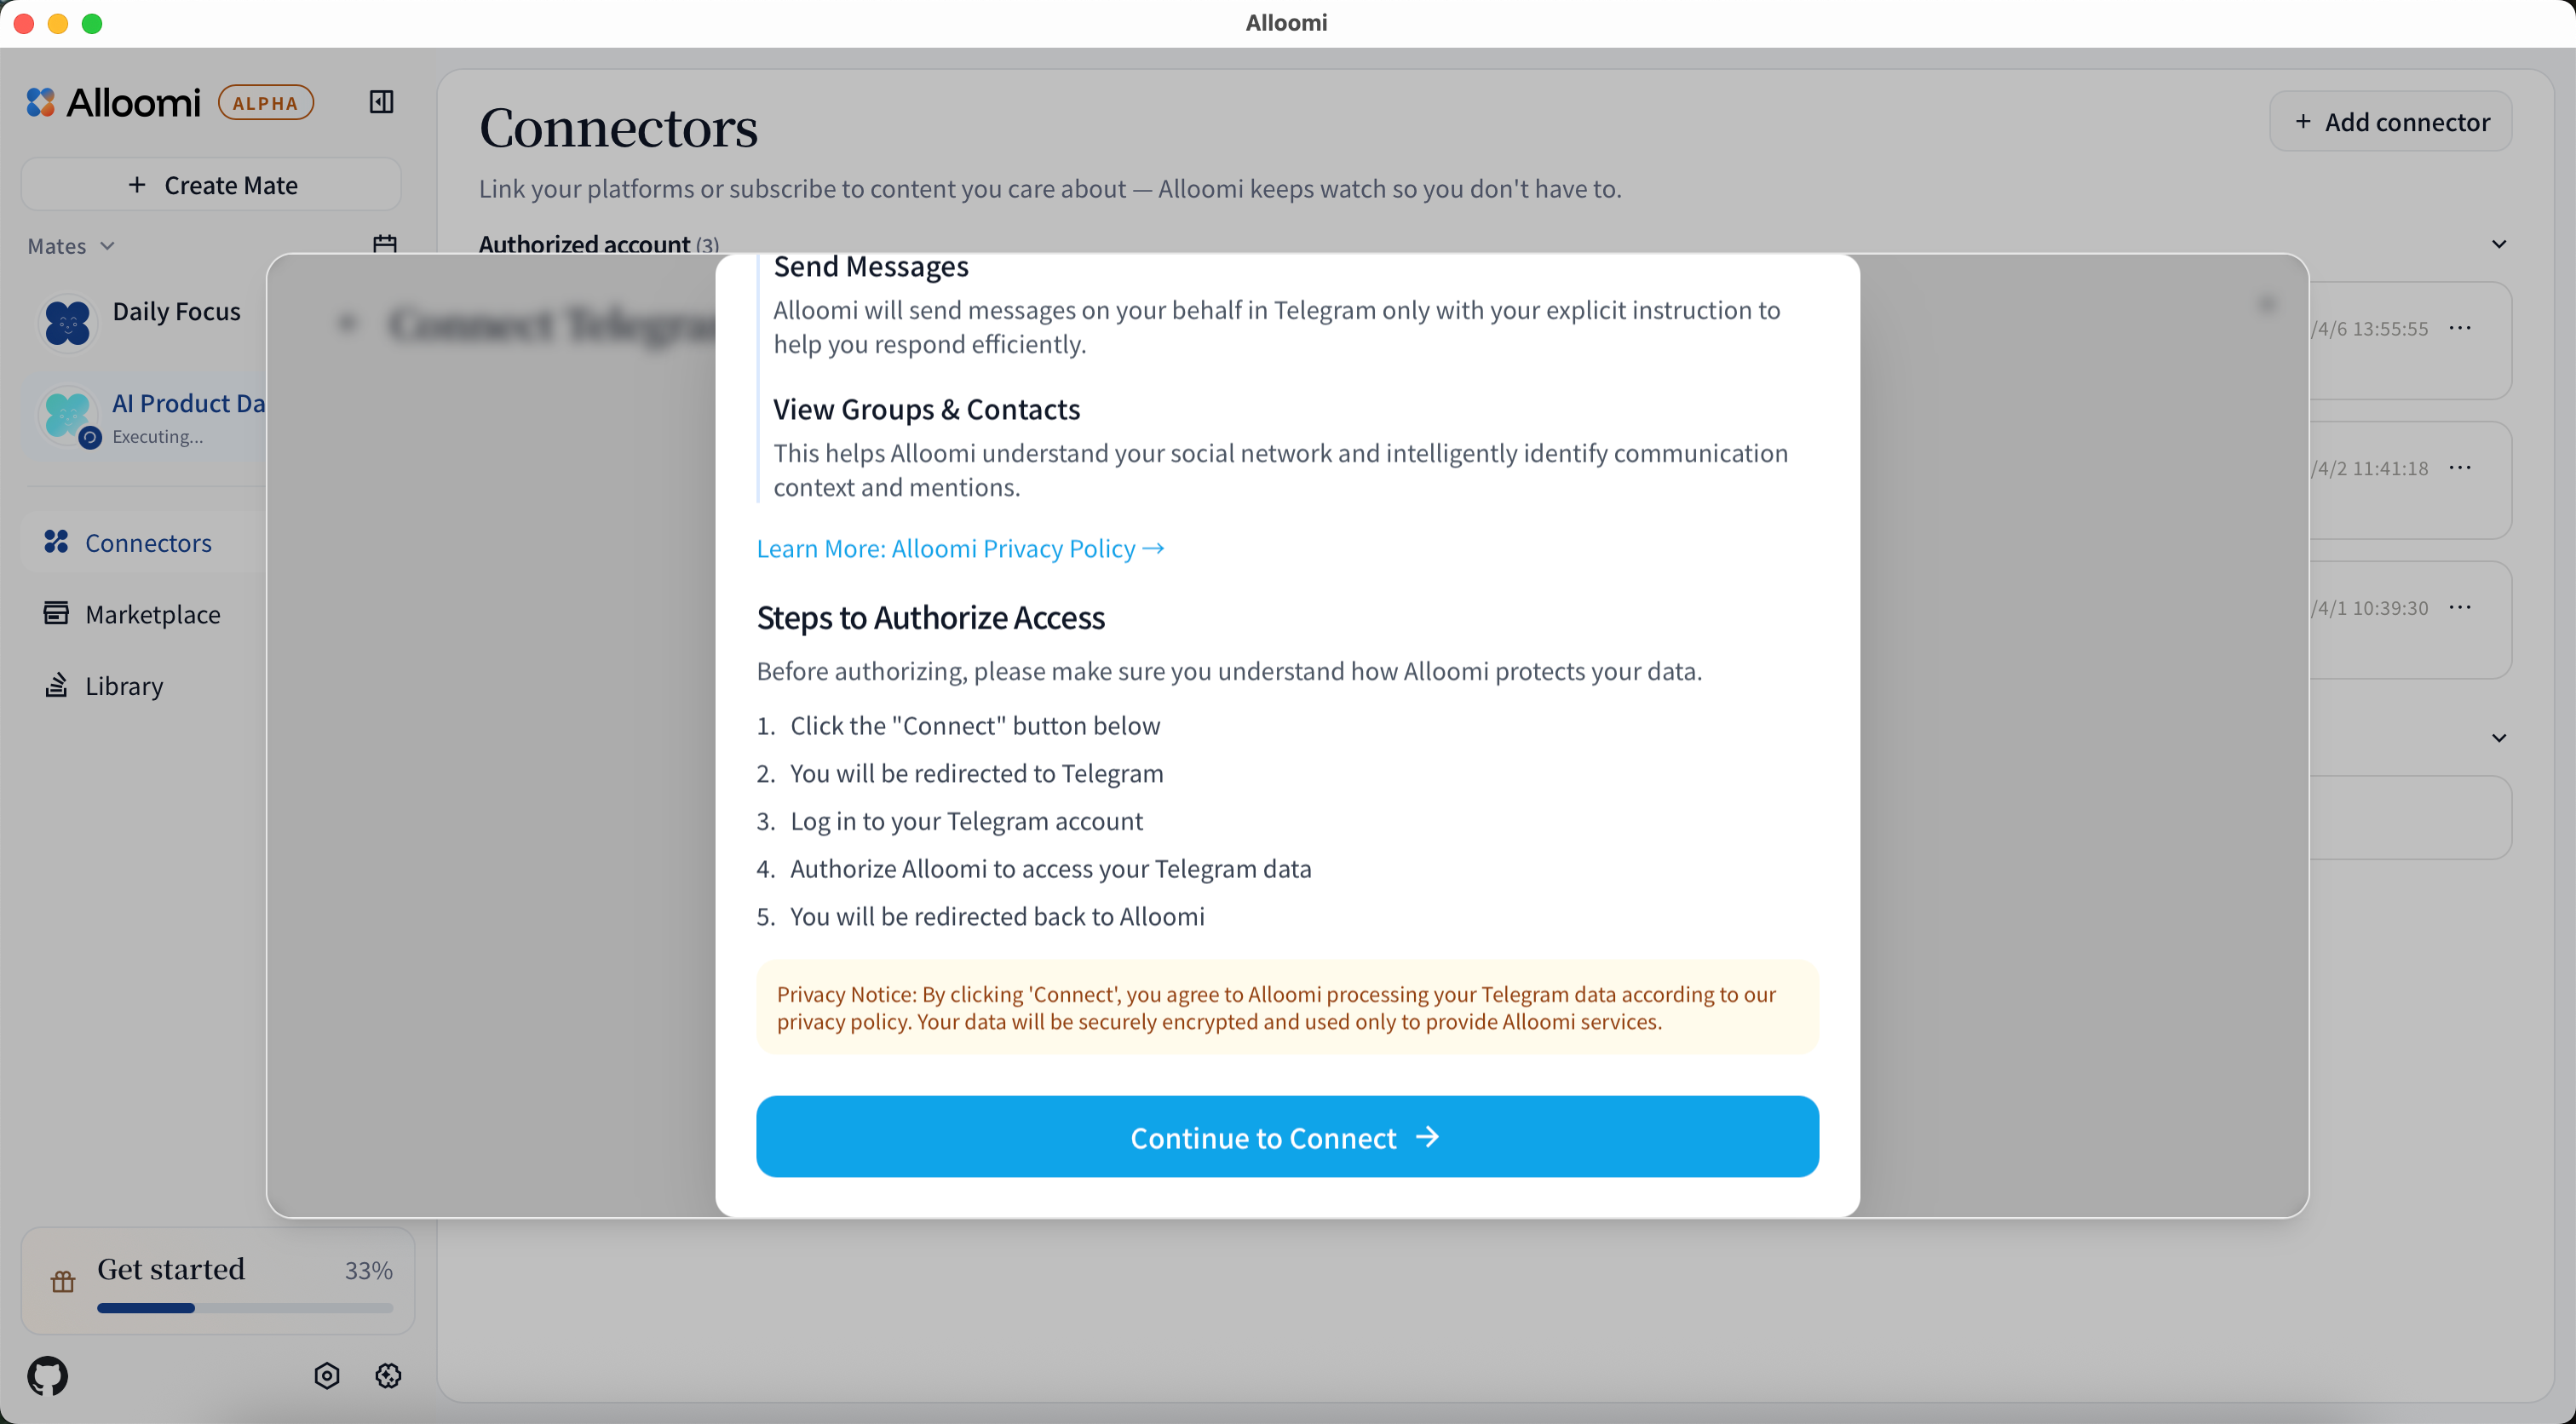
- Enter your phone number
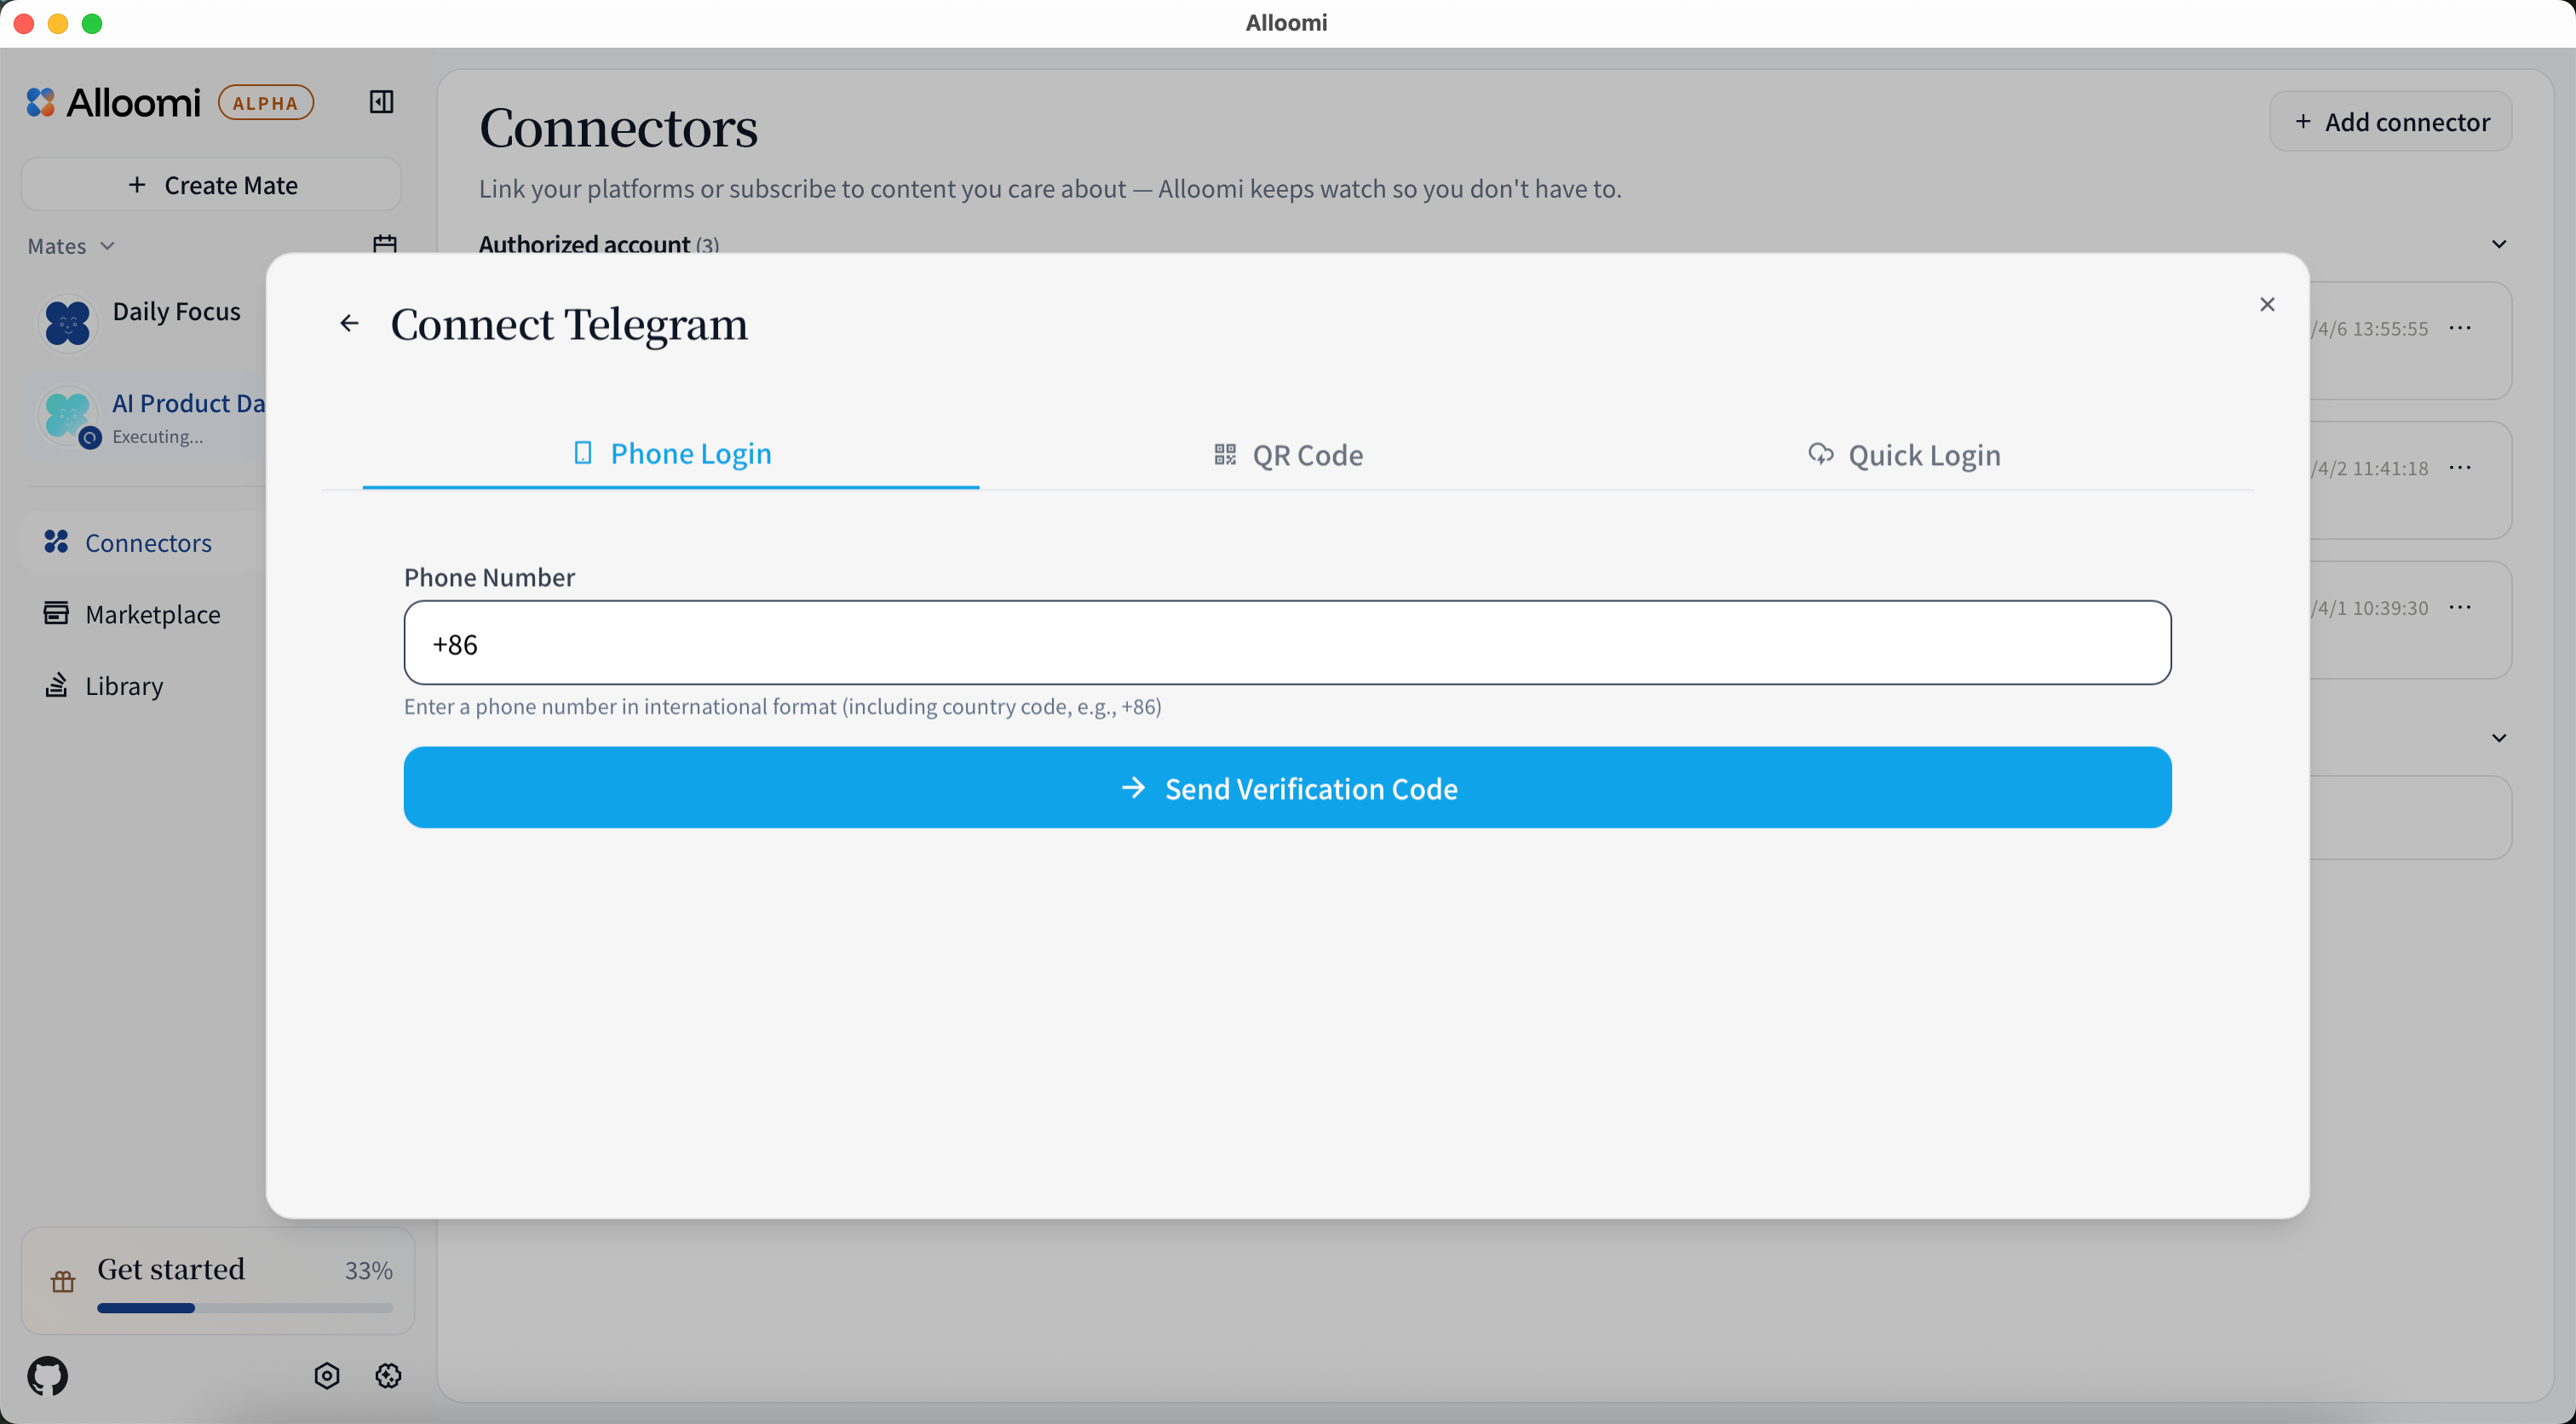
- Enter the verification code sent to your Telegram app
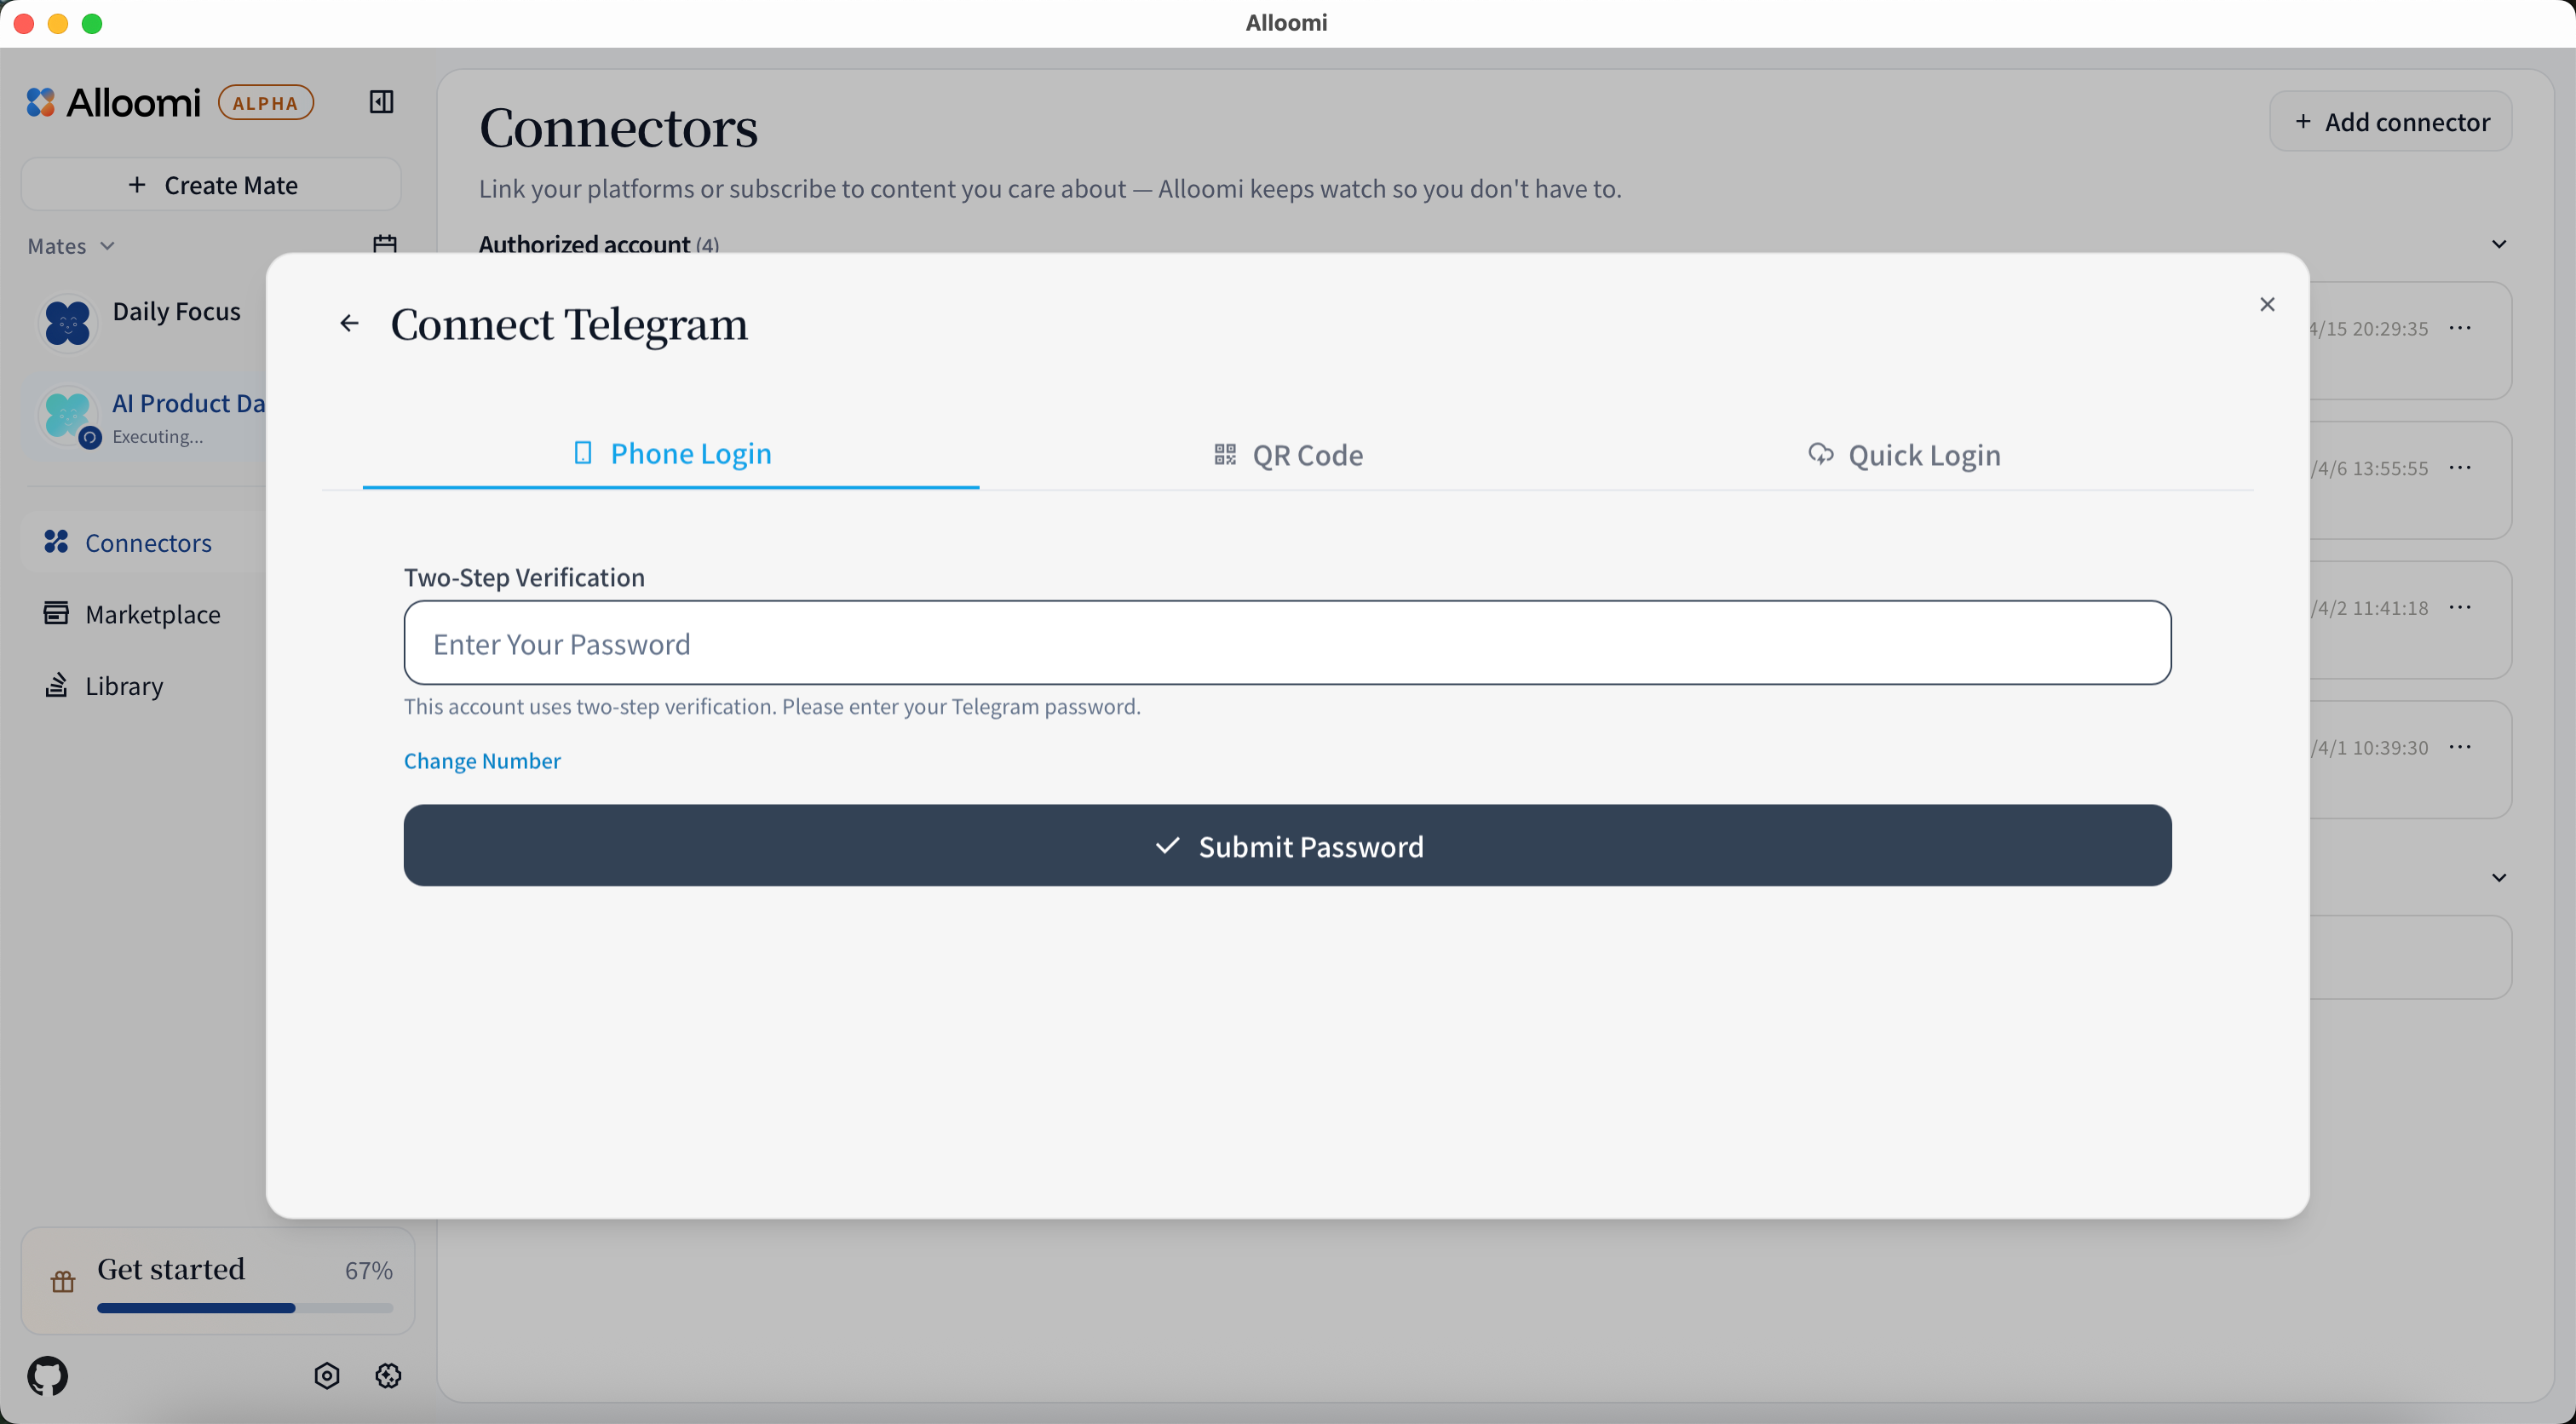
- If you have Two-Step Verification enabled, enter your password
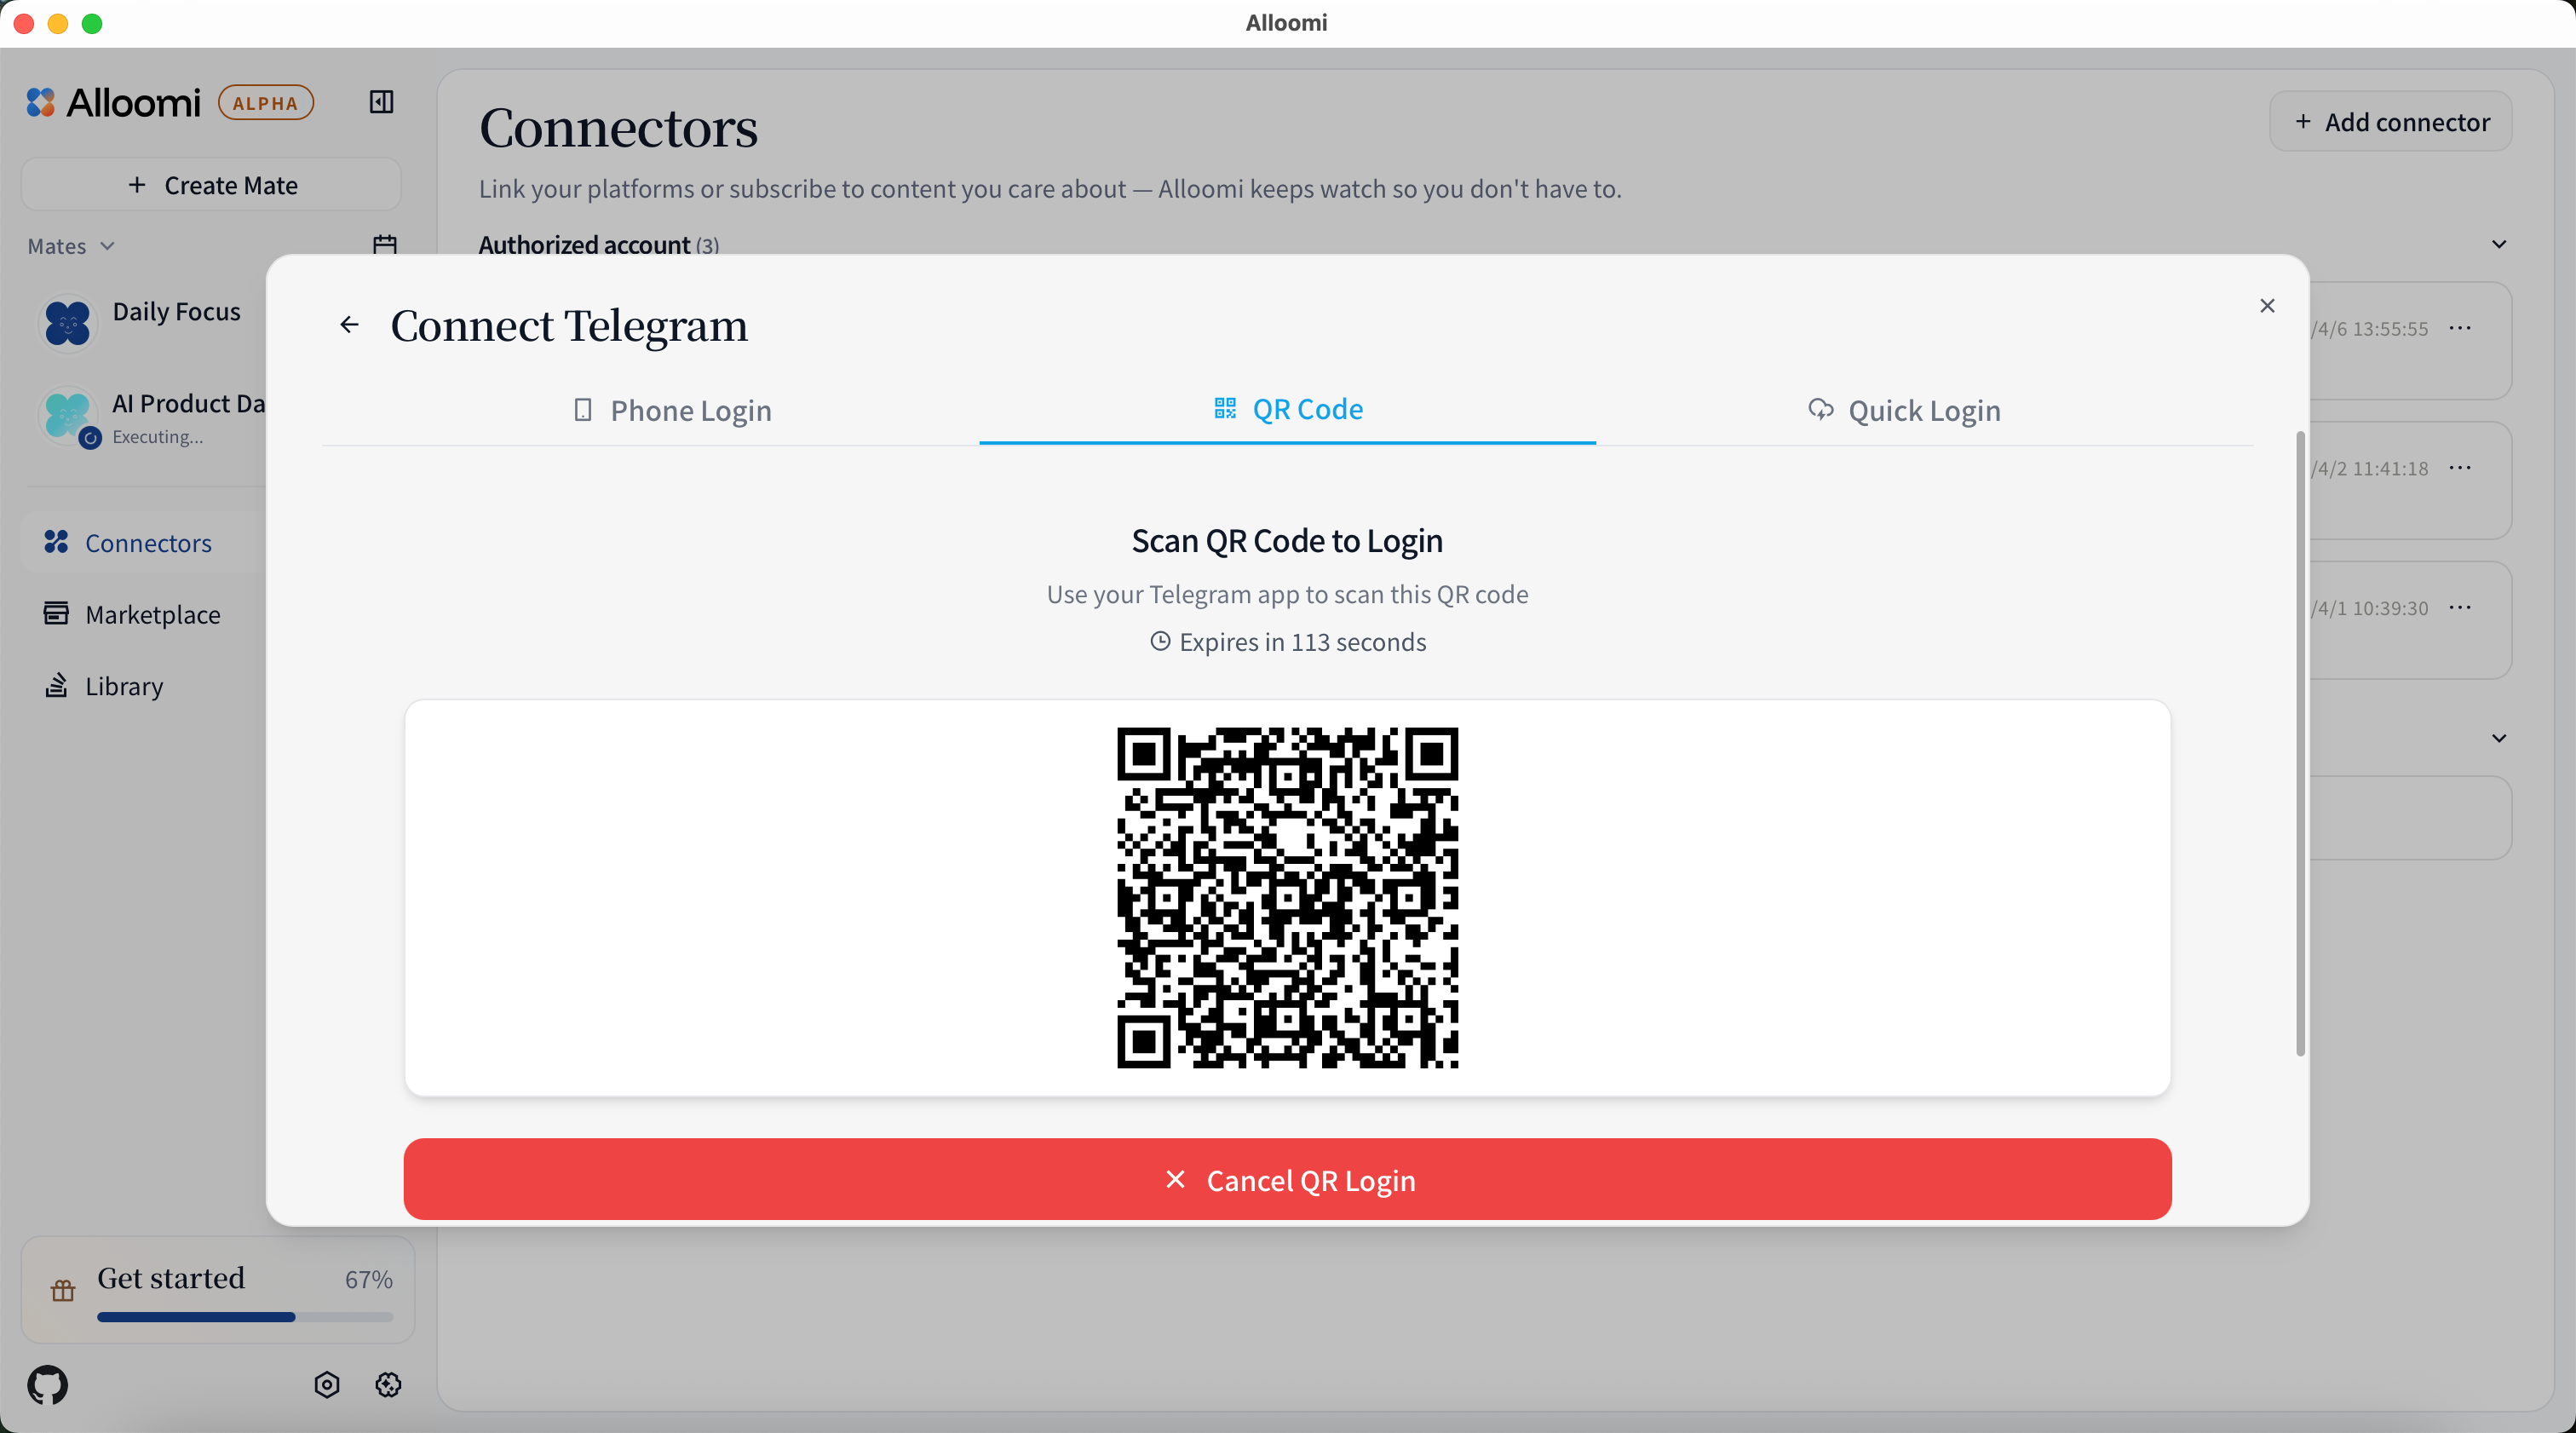
Or choose to authorize by scanning a QR code in the Telegram app
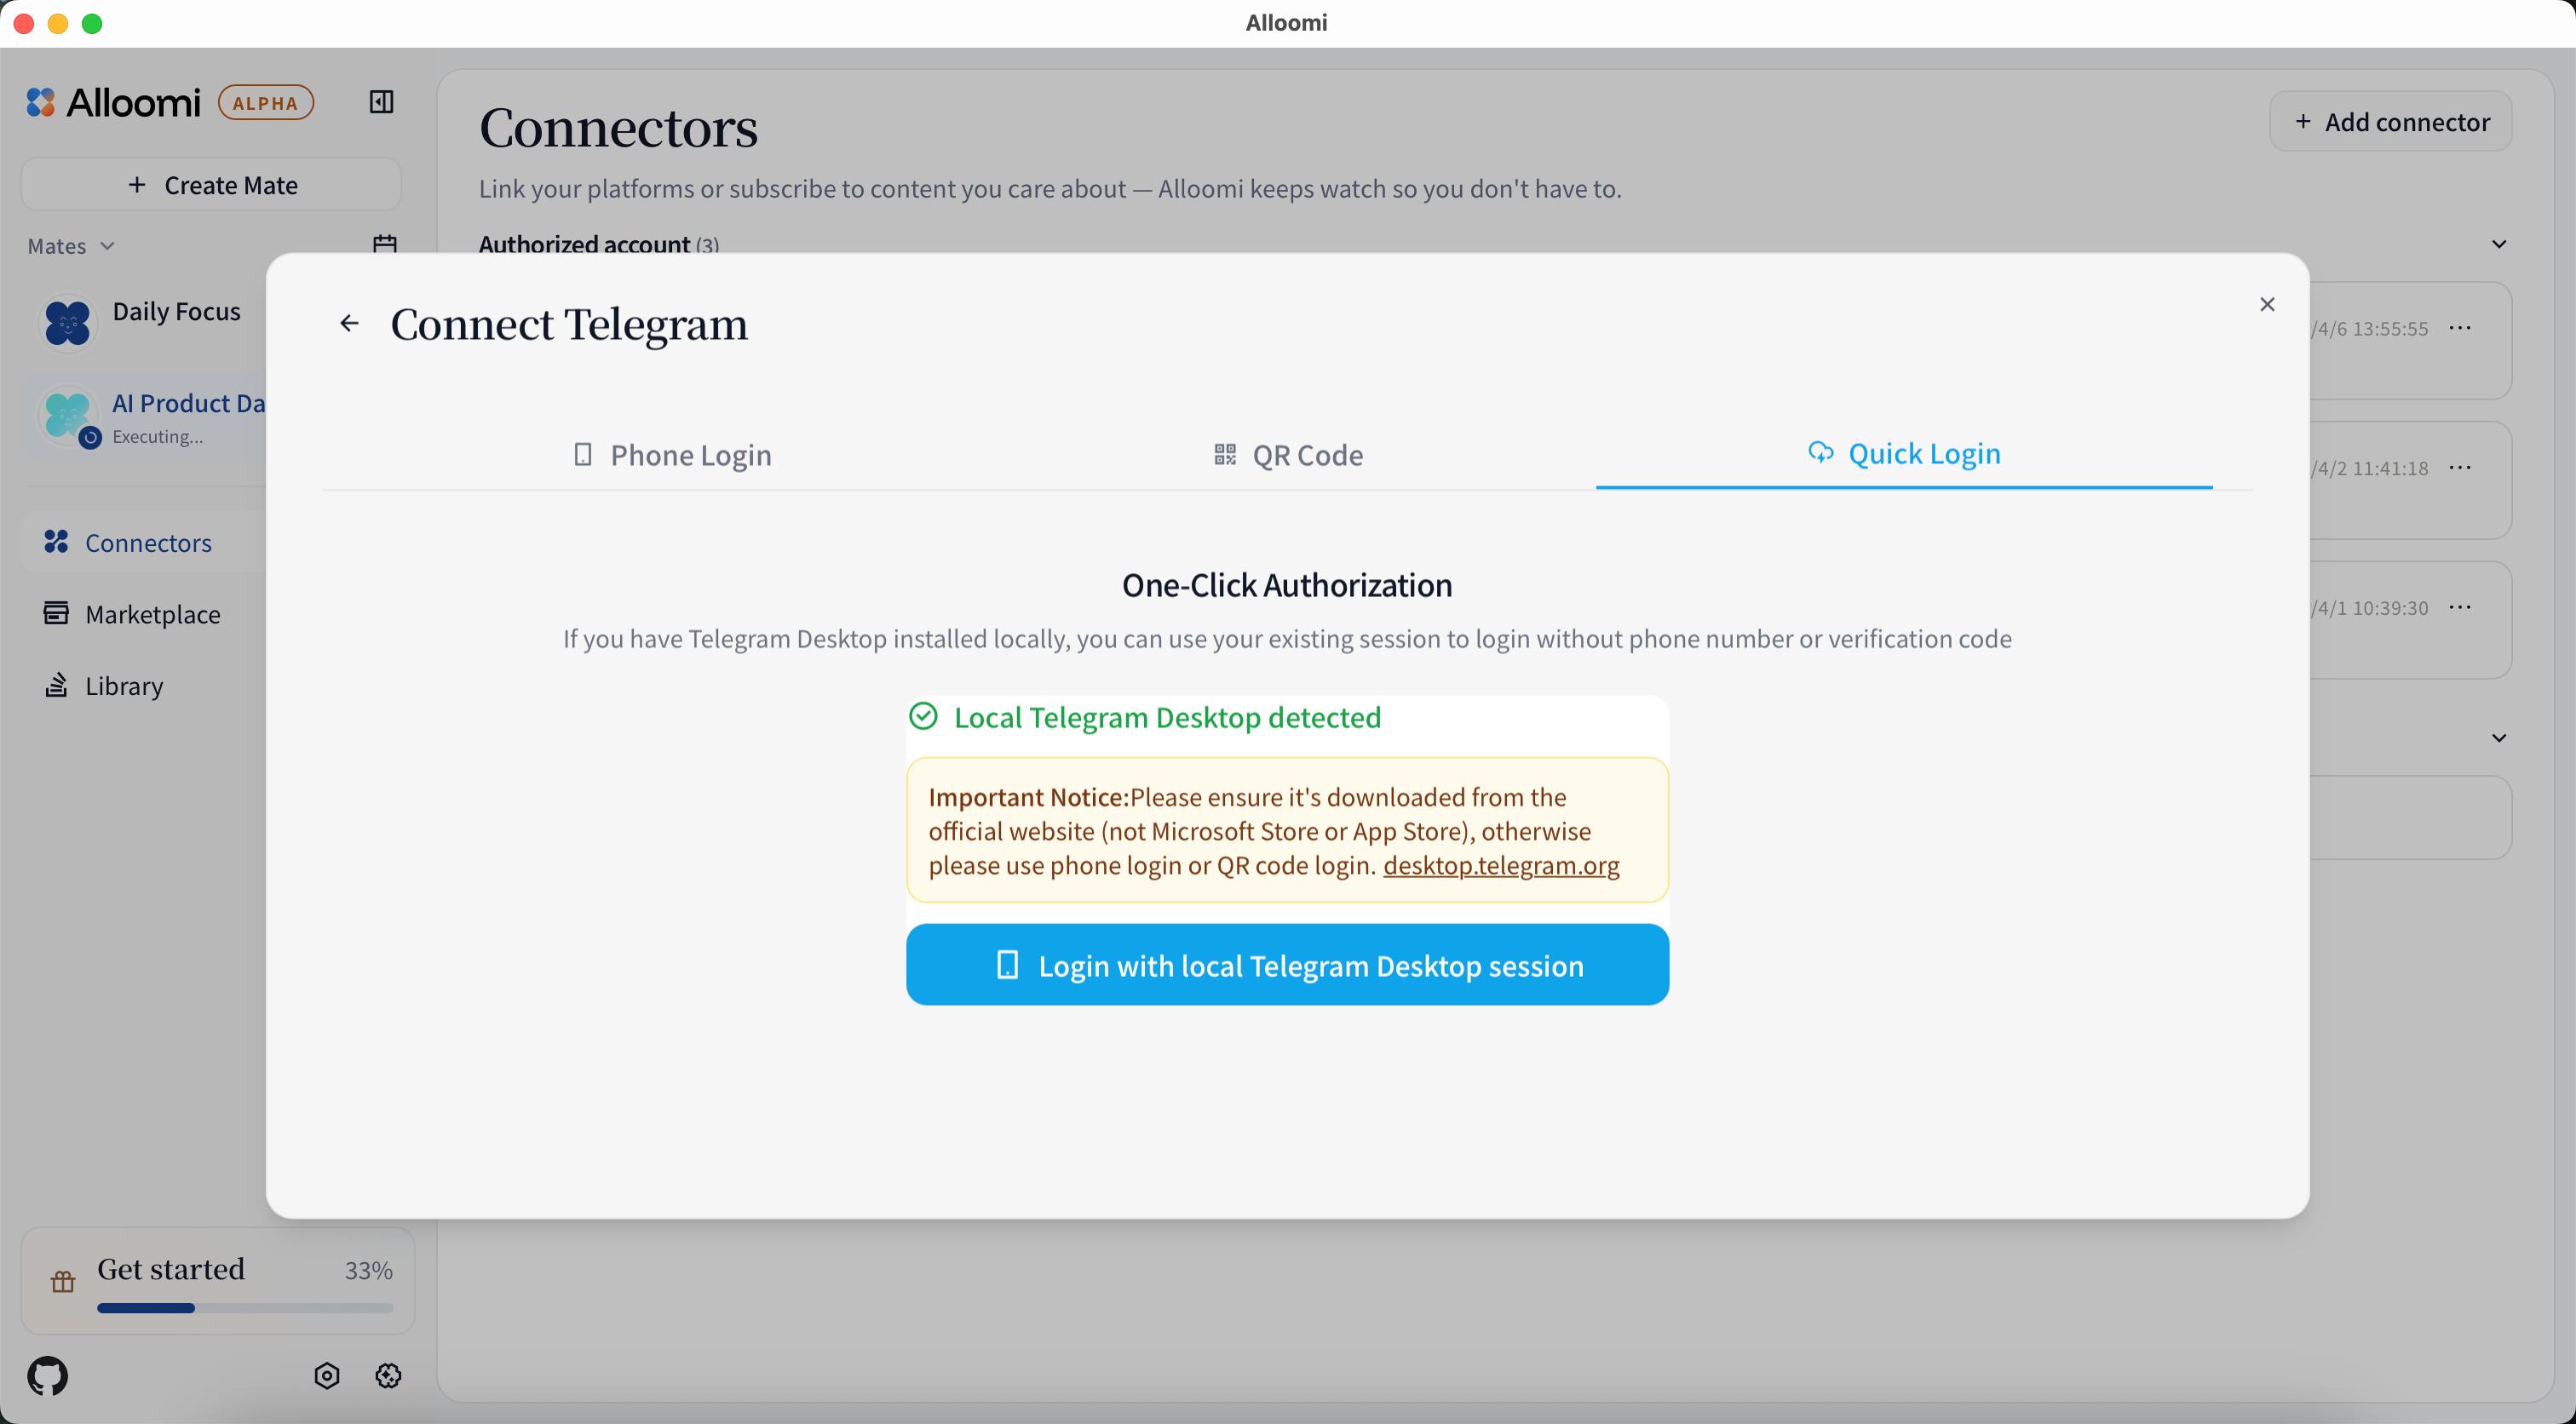
Or choose to authorize by quick login in the Telegram app if you have official telegram desktop installed locally, you can use your existing session to login without phone number or verification code
After clicking [Connect WhatsApp], scan the QR code in the WhatsApp app to complete authorization.
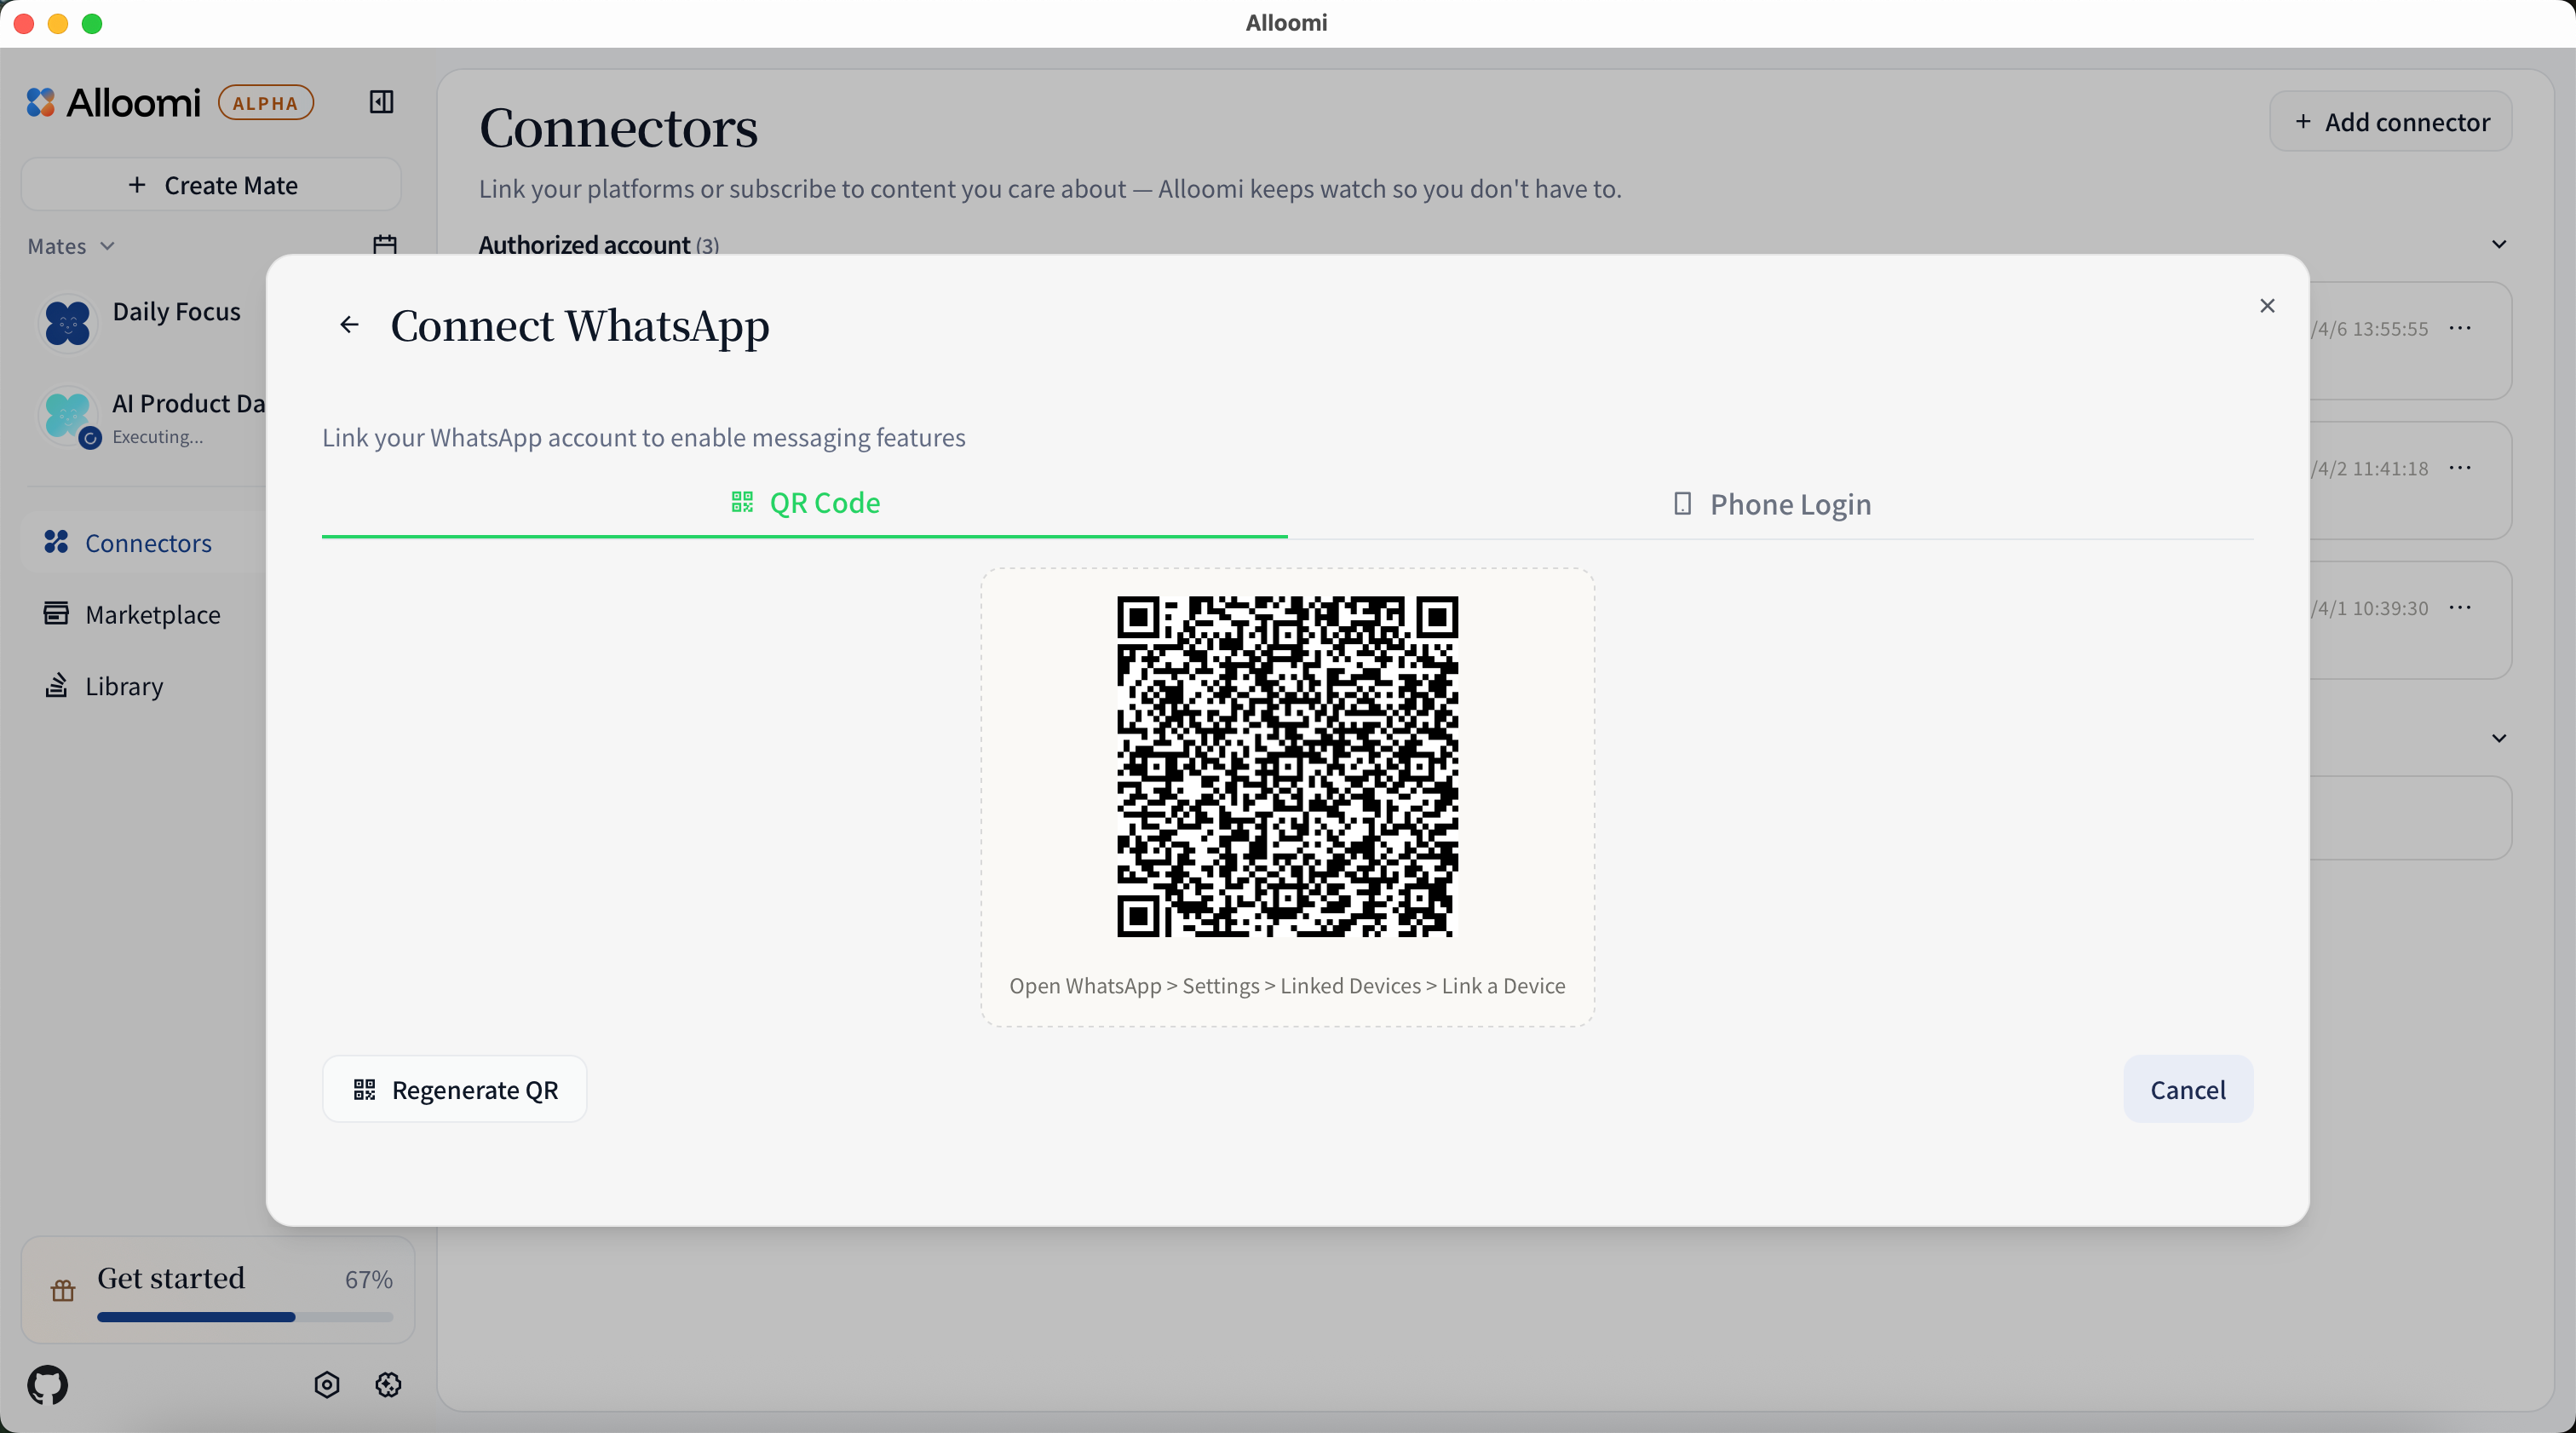
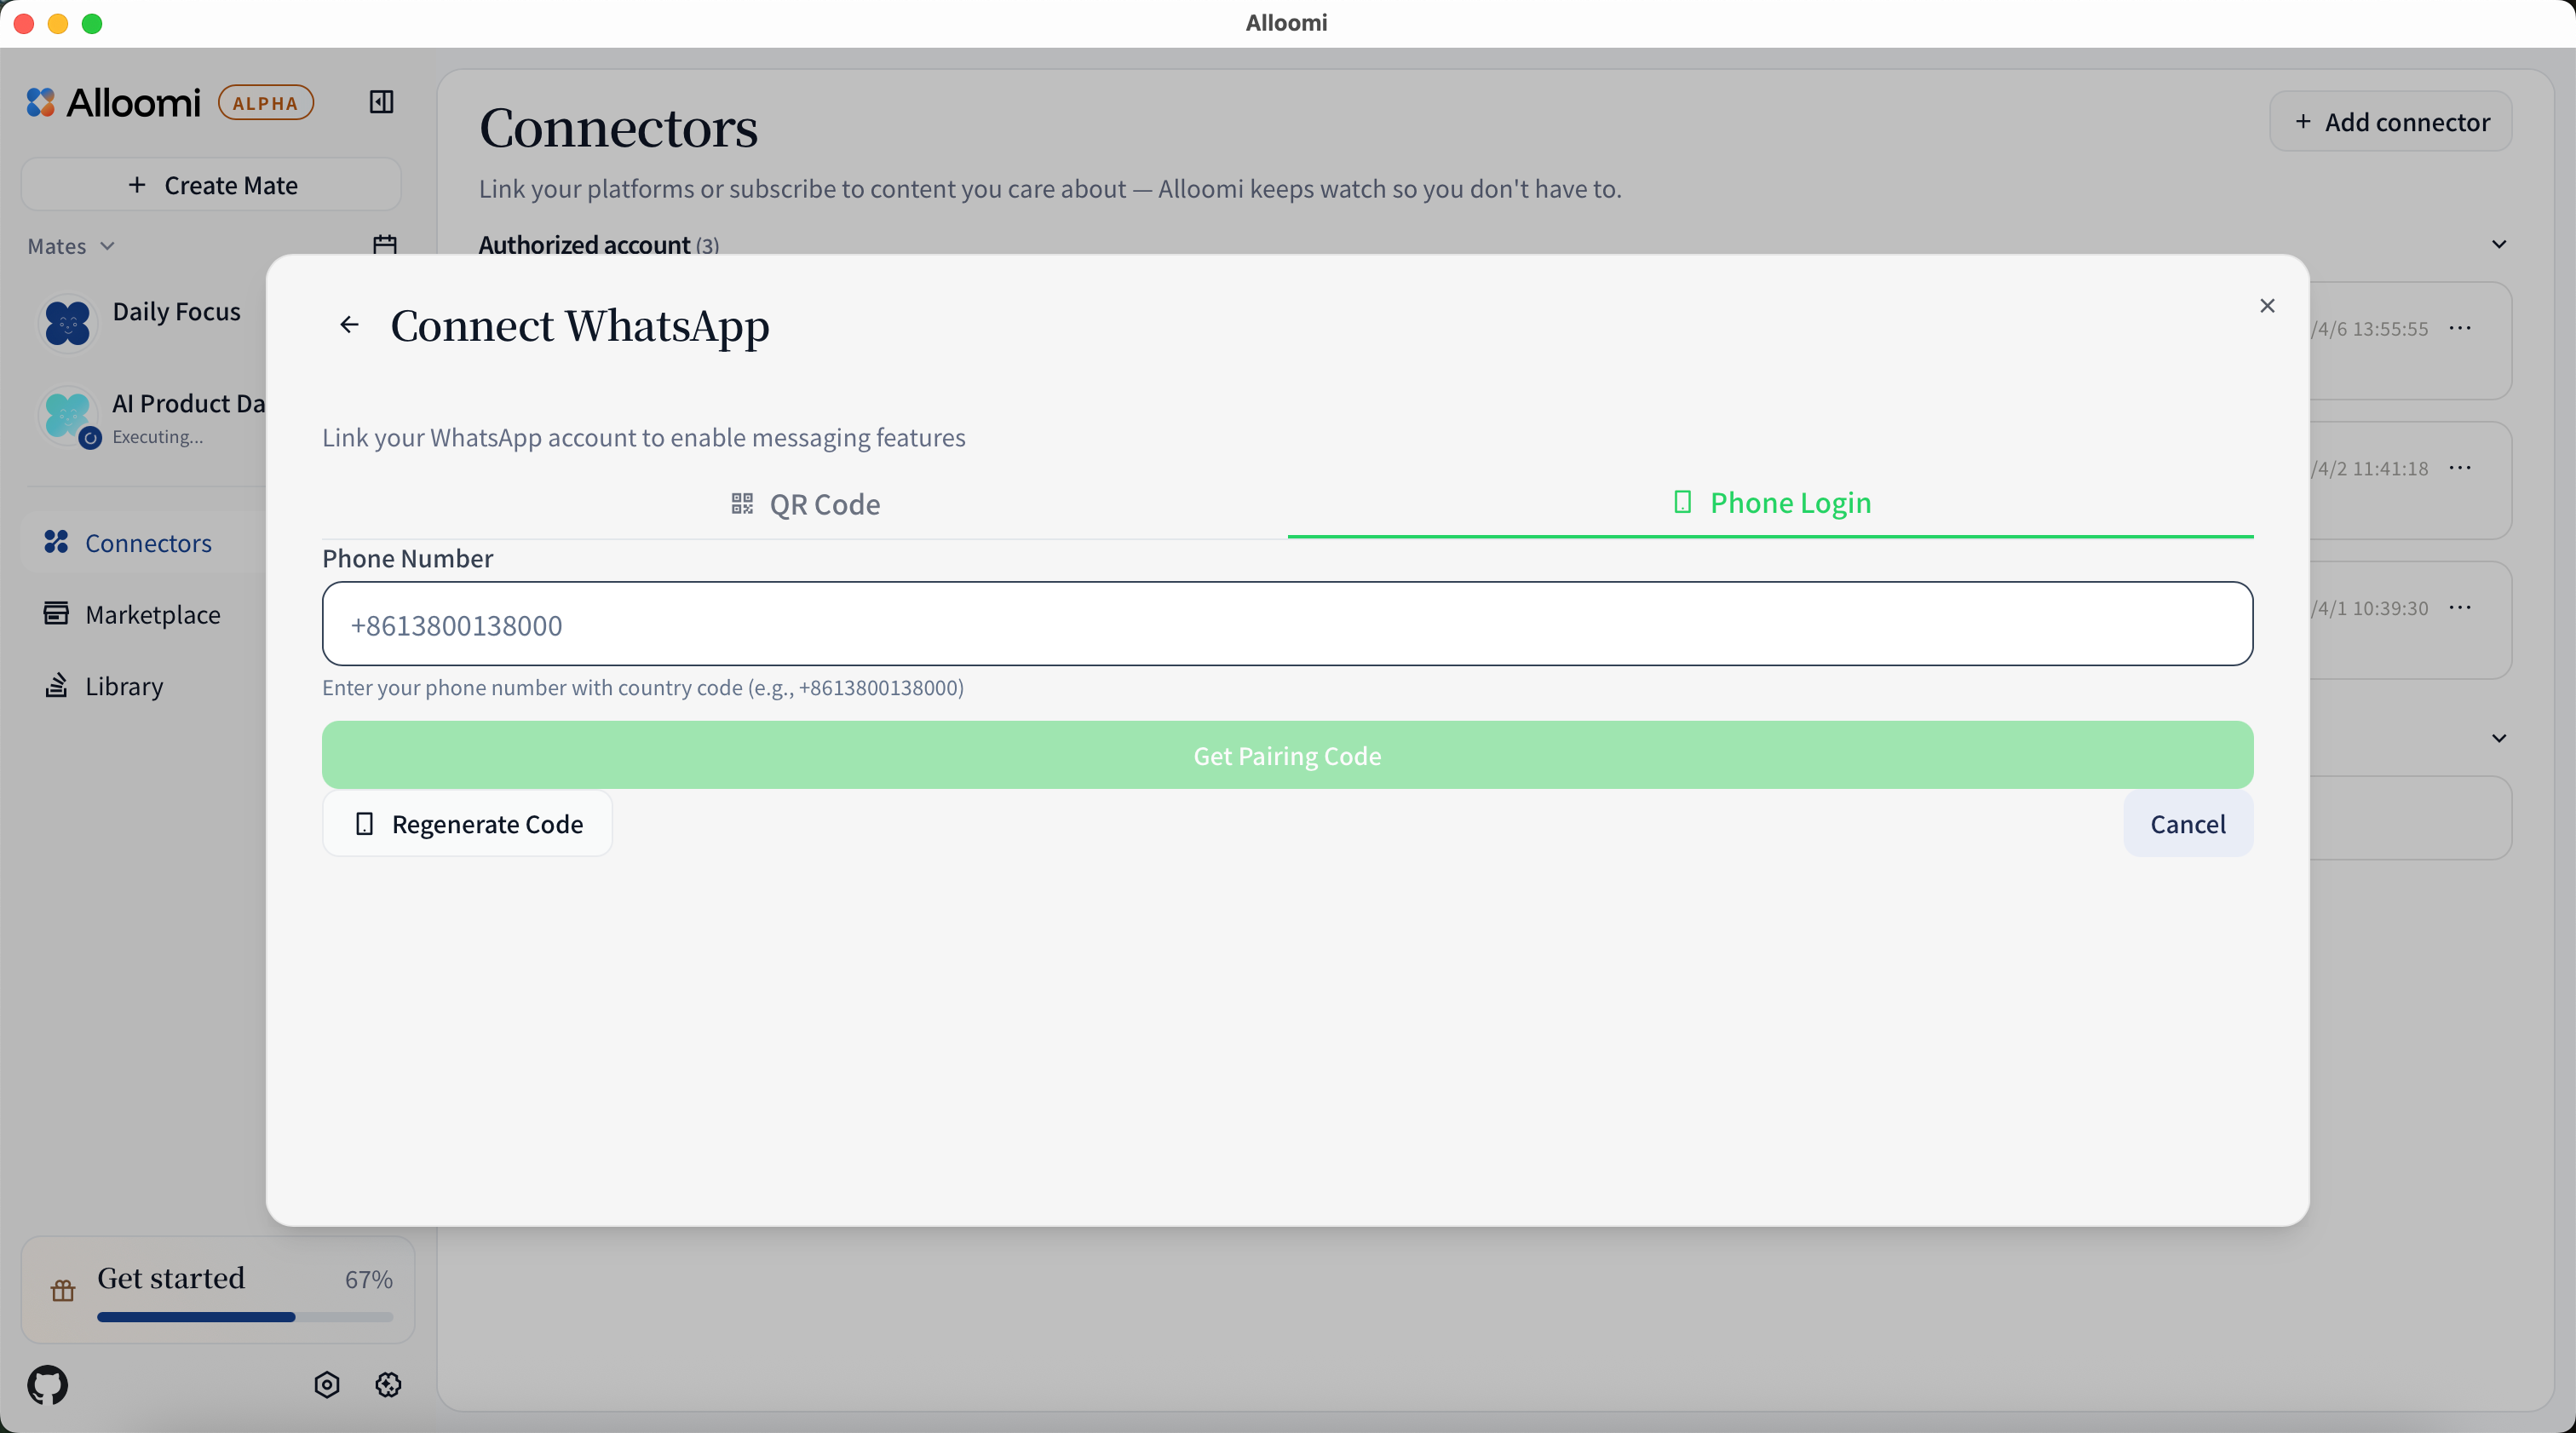
Or use a phone pair code to link WhatsApp without scanning:
iMessage
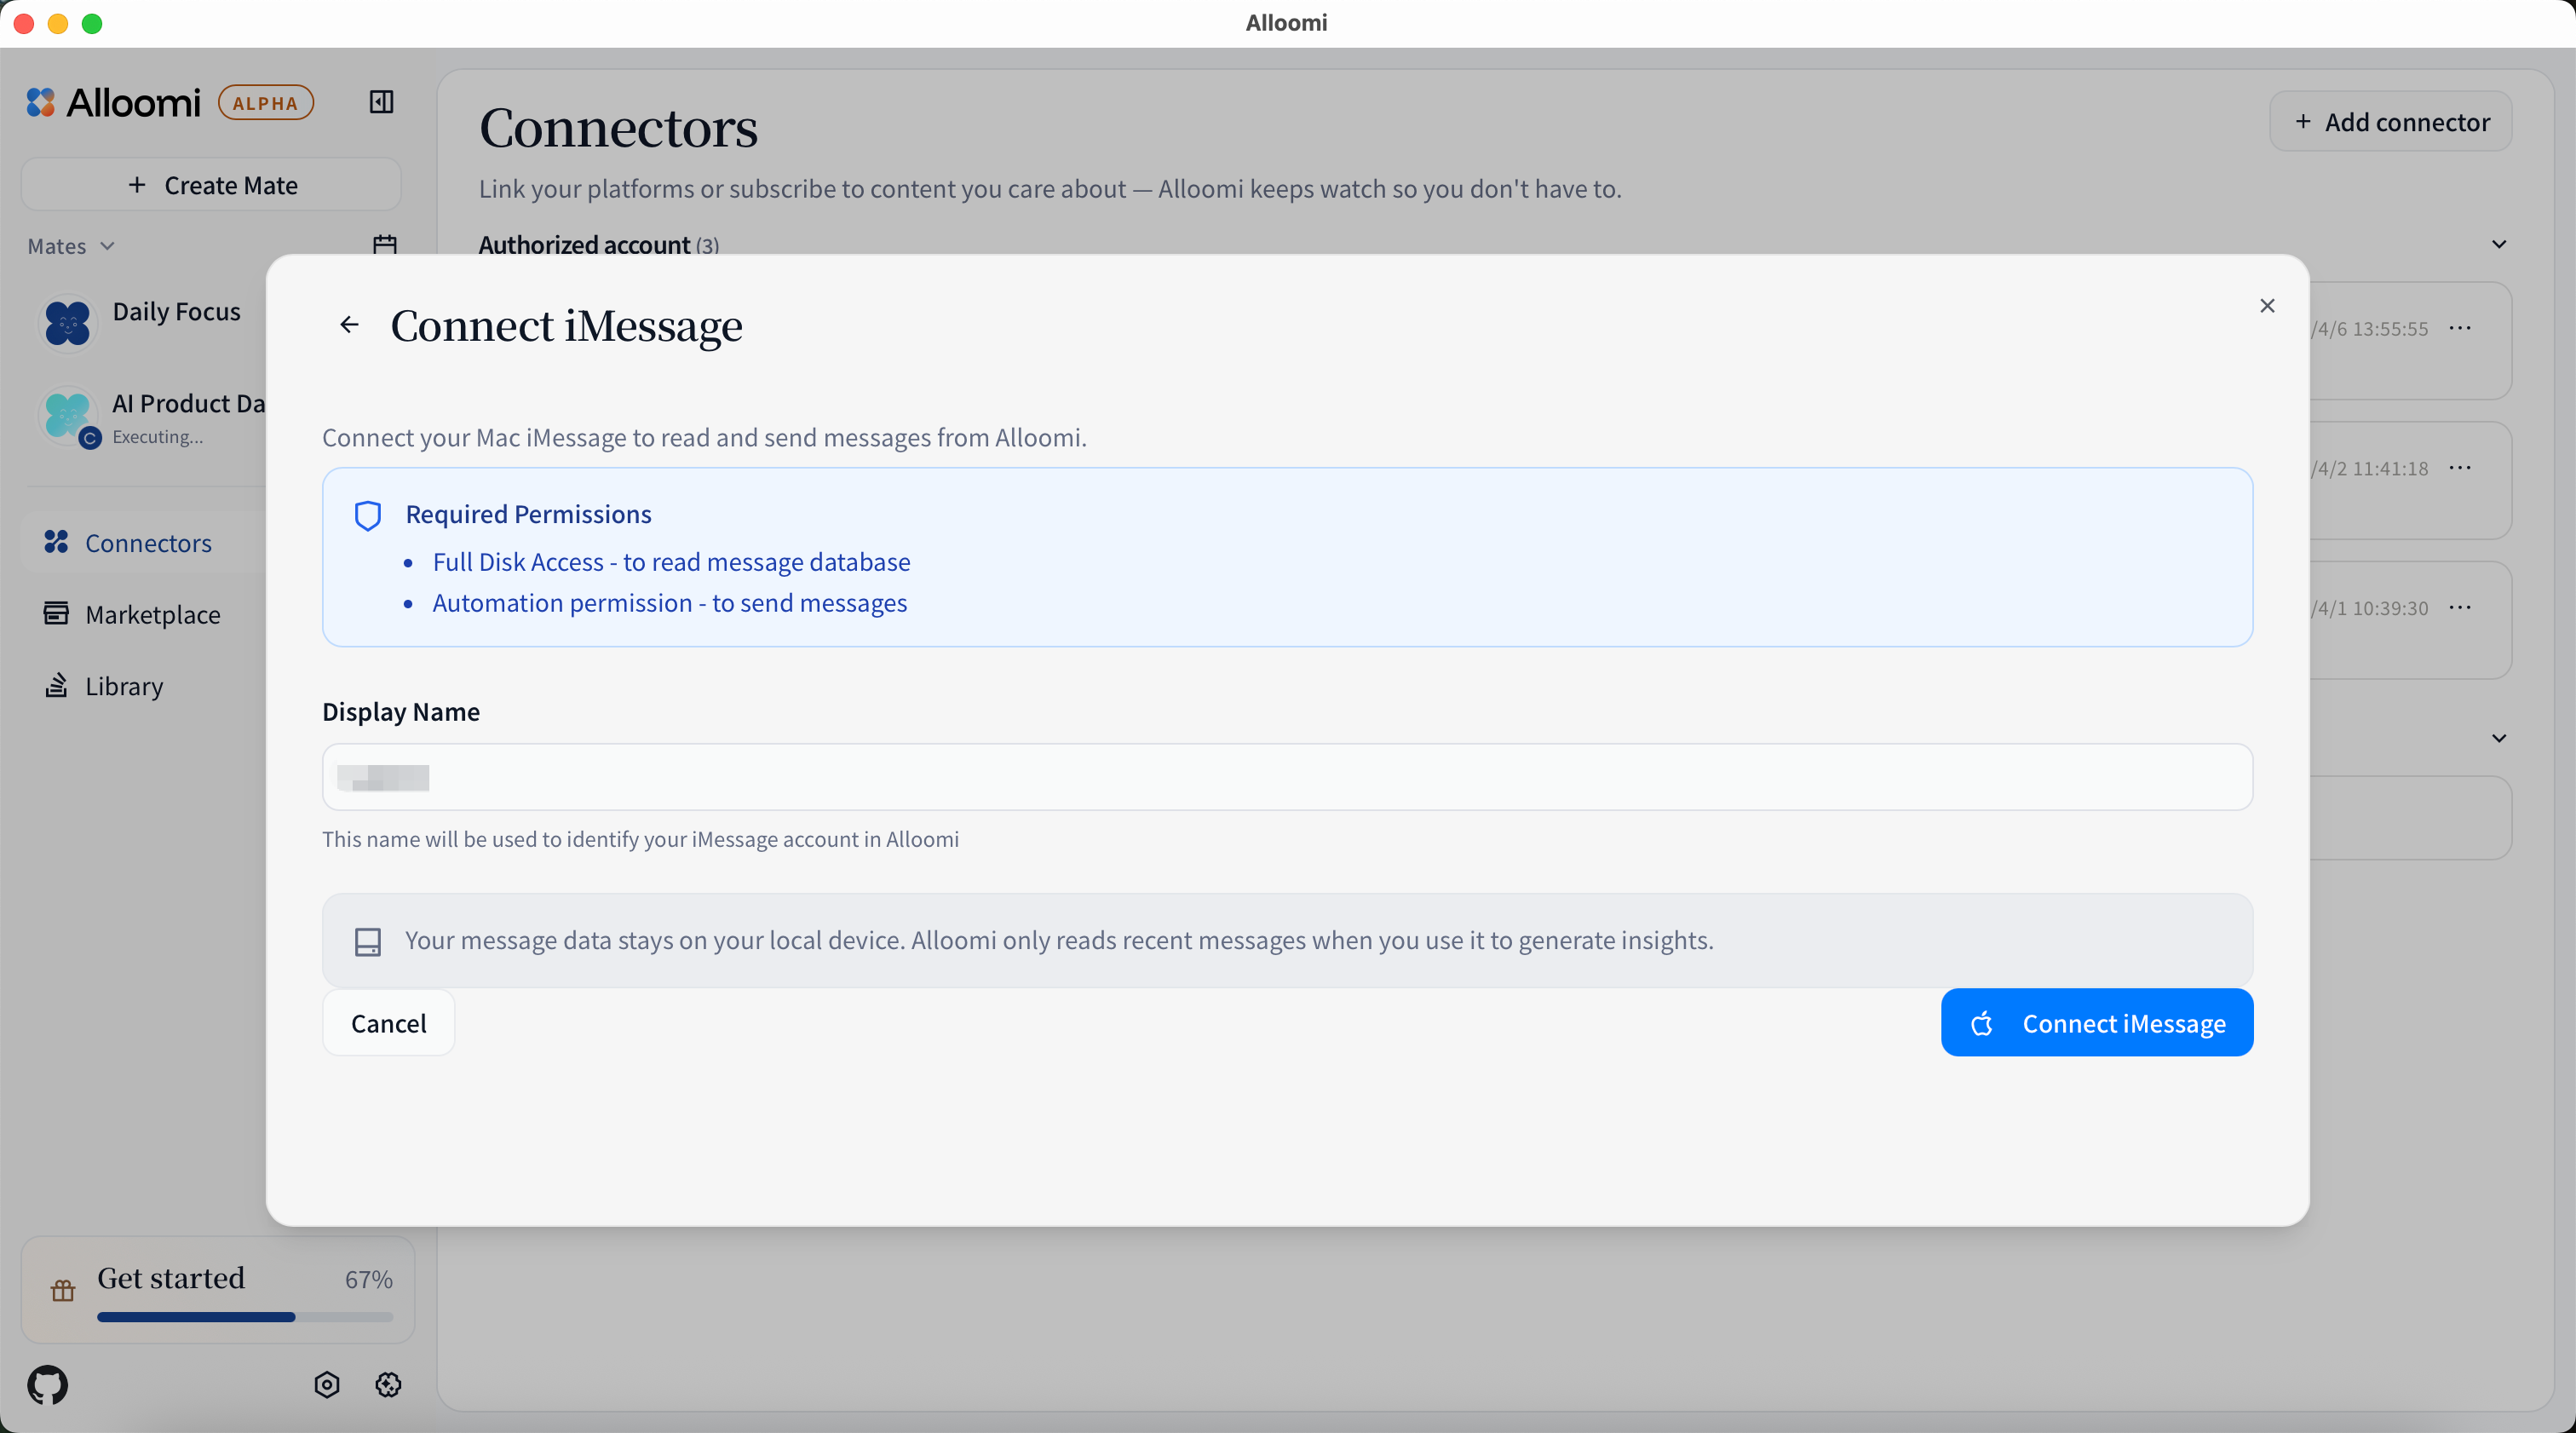
iMessage integration is only available on macOS.
- Click [Connect iMessage]
- Grant the required permissions:
- Full Disk Access - Required to read iMessage database
- Automation Permission - Required to send messages
- Enter a display name for your iMessage account
- Click connect
How to grant permissions:
- Go to System Settings > Privacy & Security > Full Disk Access
- Add the running app (Terminal, Node, or OpenLoomi)
- Restart the app after granting permissions
💡 Your message data stays on your local device. OpenLoomi only reads recent messages when you use it to generate insights.
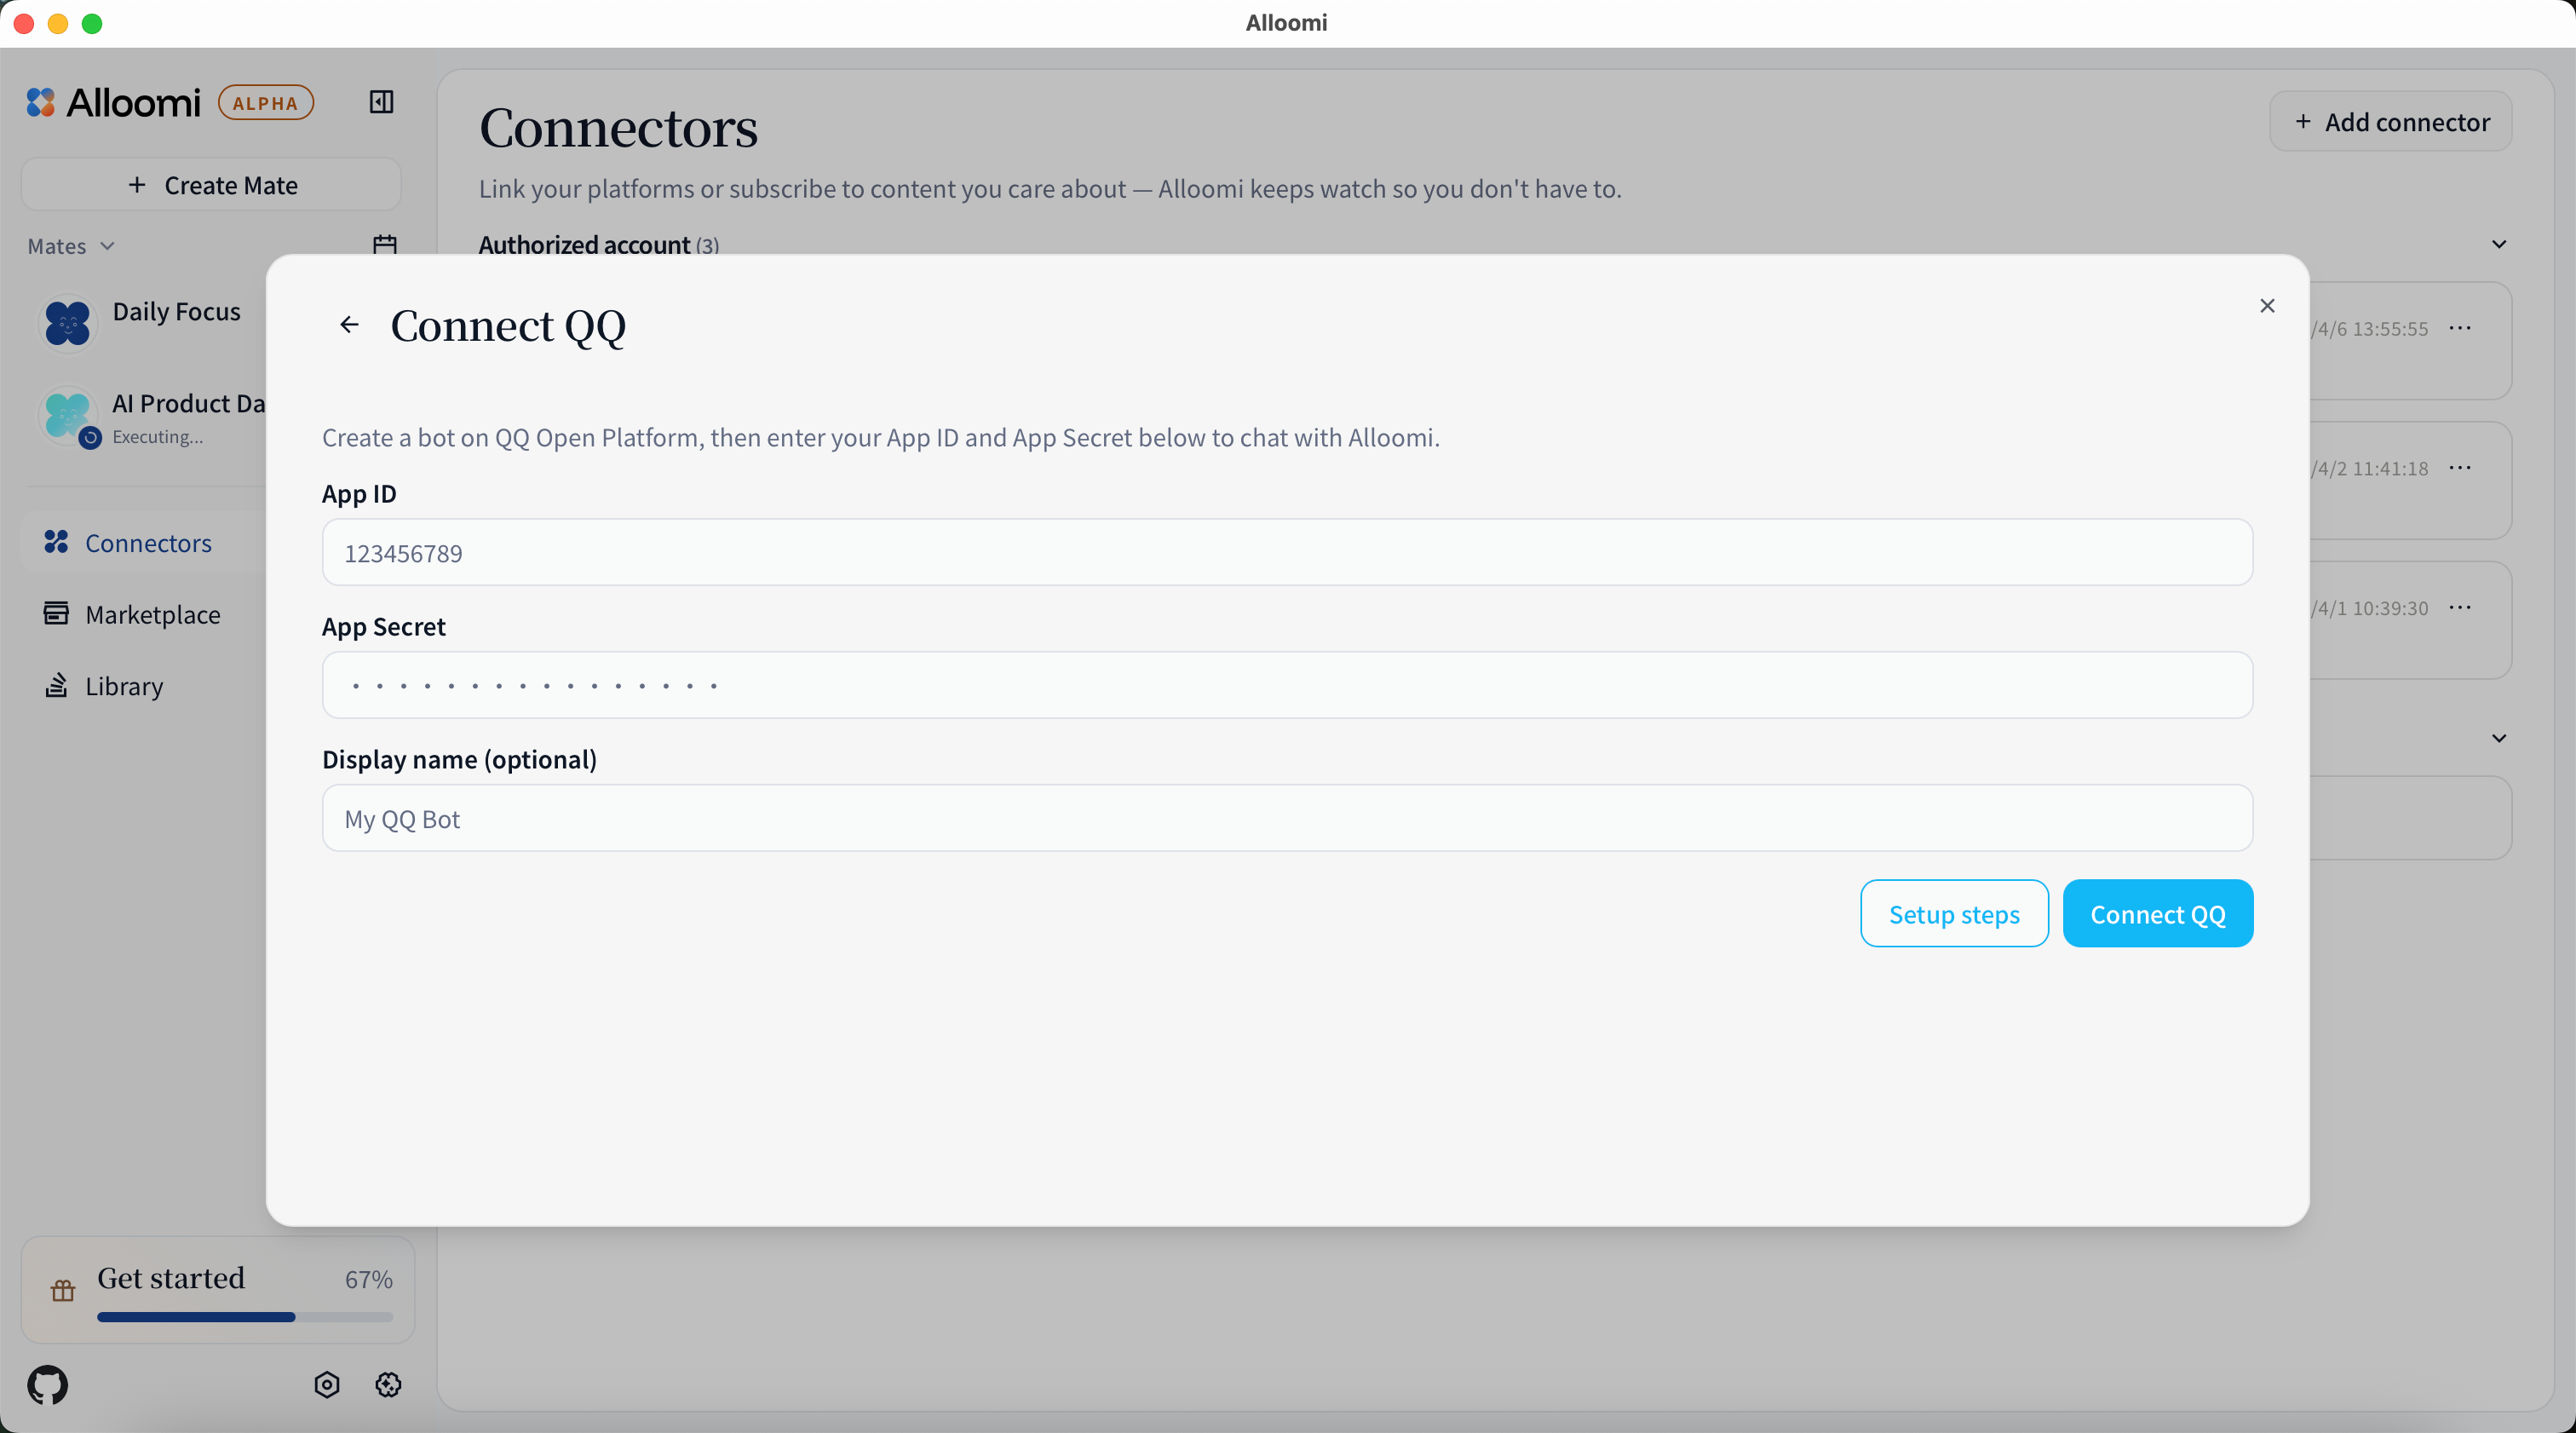
QQ integration uses a bot mode via a persistent WebSocket connection. Unlike Telegram or iMessage (which connect to your personal account), QQ requires you to set up a QQ bot first.
Before you start — set up a QQ bot:
- Register a QQ bot at the QQ Open Platform
- Create a new bot application and obtain your Bot App ID and Bot Token
- Enable the message receive permissions for your bot
Connect in OpenLoomi:
- Click + Add New Connector and select QQ
- Enter your Bot App ID and Bot Token
- Click Connect — OpenLoomi establishes a long-lived WebSocket connection to your bot
Once connected, users who message your QQ bot will have their conversations processed by OpenLoomi. OpenLoomi replies as the bot.
💡 QQ integration is in bot mode — OpenLoomi reads messages sent to your bot, not your personal QQ account.
Lark/Feishu
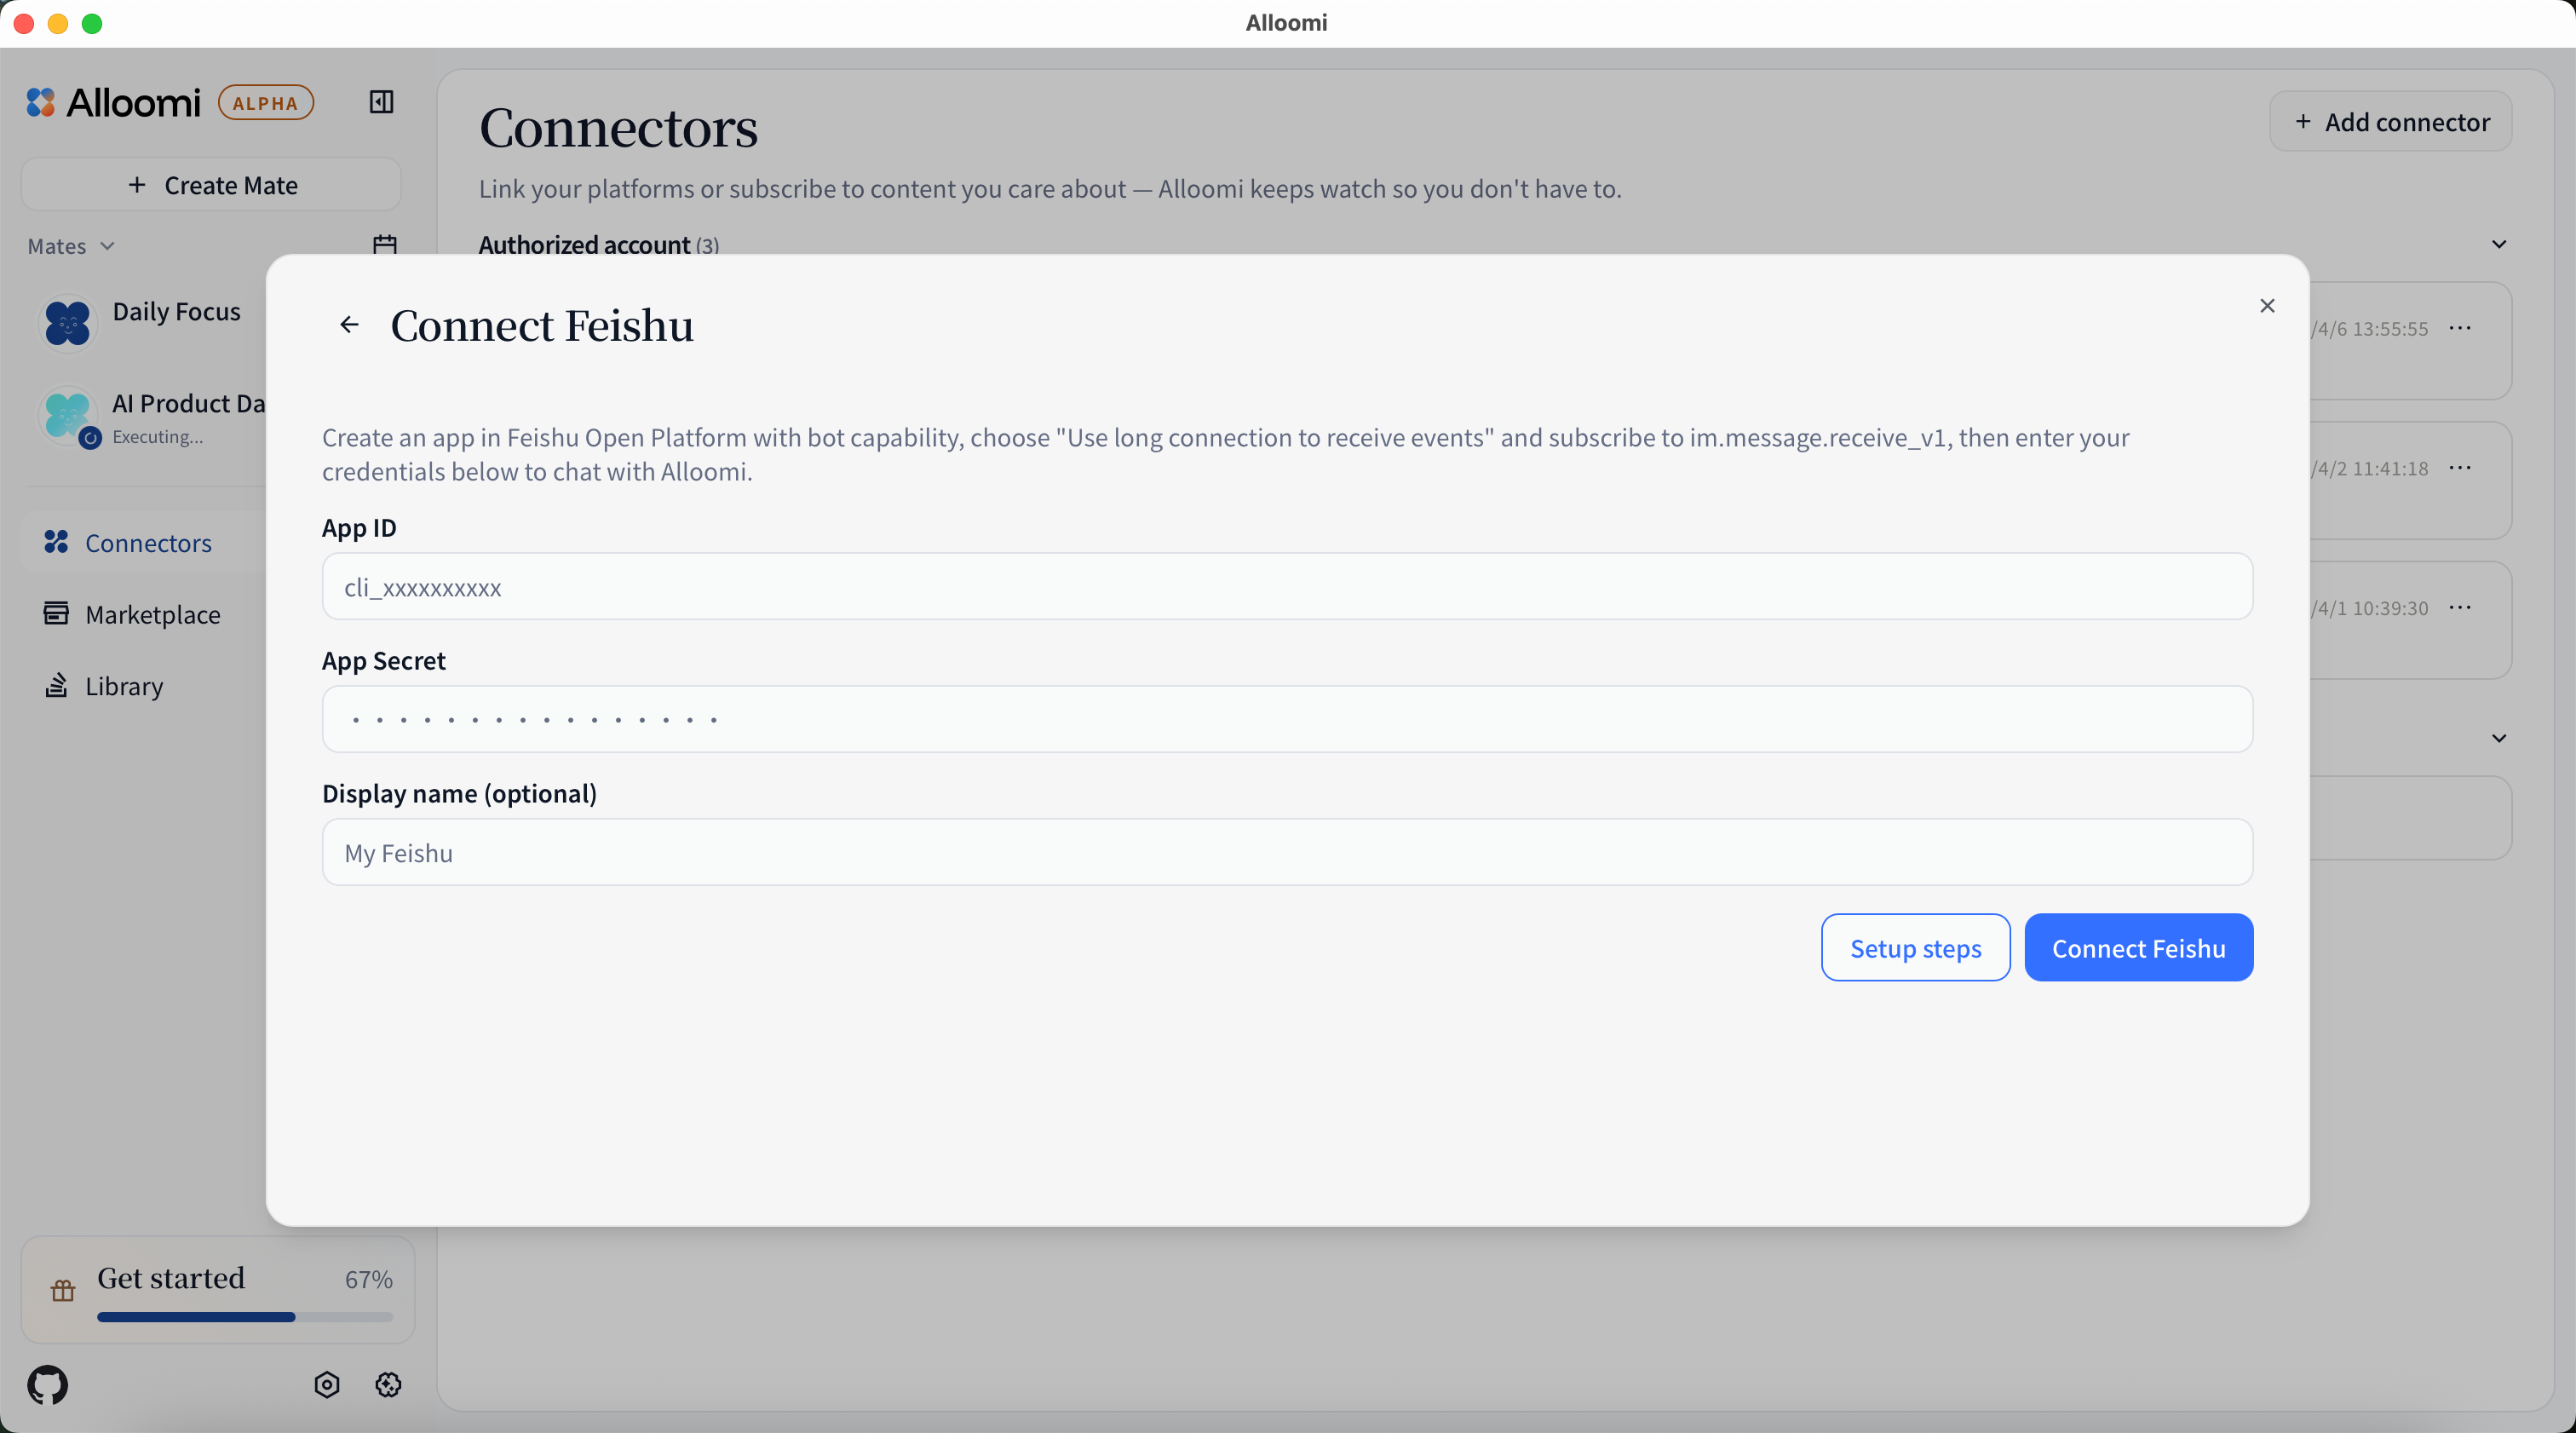
Lark/Feishu integration uses a bot mode via a WebSocket long connection. You need to create an enterprise self-built application on the Lark/Feishu Open Platform — no public IP or domain is required.
⚠️ Important — App must be published: After setting up in the Lark/Feishu Open Platform, your app must be published in the enterprise admin console before colleagues can find and message it. This is the #1 reason the bot doesn't appear.
Step 1 — Create a Lark/Feishu app:
- Go to Lark/Feishu Open Platform and sign in
- Click Create enterprise self-built app → fill in app name → click Create
- On the left sidebar, go to App capabilities → Bot → click Add
Step 2 — Configure permissions:
- Go to Permissions management → Add permissions
- Search and enable these permissions:
Tenant-level scopes:
| Permission key | Description |
|---|---|
aily:file:read | Read Aily files |
aily:file:write | Write Aily files |
application:application.app_message_stats.overview:readonly | Read app message stats |
application:application:self_manage | Manage application |
application:bot.menu:write | Write bot menu |
cardkit:card:write | Write card |
contact:user.employee_id:readonly | Read employee ID |
corehr:file:download | Download CoreHR files |
docs:document.content:read | Read document content |
event:ip_list | IP list |
im:chat | Chat access |
im:chat.access_event.bot_p2p_chat:read | Read bot P2P chat events |
im:chat.members:bot_access | Bot access to chat members |
im:message | Message access |
im:message.group_at_msg:readonly | Read group @ messages |
im:message.group_msg | Group message |
im:message.p2p_msg:readonly | Read direct messages |
im:message:readonly | Read message content |
im:message:send_as_bot | Send messages as bot |
im:resource | Access resources |
sheets:spreadsheet | Spreadsheet access |
wiki:wiki:readonly | Read wiki |
User-level scopes:
| Permission key | Description |
|---|---|
aily:file:read | Read Aily files |
aily:file:write | Write Aily files |
im:chat.access_event.bot_p2p_chat:read | Read bot P2P chat events |
im:chat:read | Read chat |
im:chat:readonly | Read chat info |
Step 3 — Subscribe to events (use WebSocket):
- Go to Event Subscriptions
- Choose Receive events via WebSocket (long connection) — no domain or IP needed
- Click Add event → search for
im.message.receive_v1→ add it
Step 4 — Get your credentials:
Go to Credentials & Basic Info and copy your:
- App ID (starts with
cli_) - App Secret
Step 5 — Connect in OpenLoomi:
- In OpenLoomi, go to Settings → Connectors → + Add New Connector → select Lark/Feishu
- Enter your App ID and App Secret
- Click Connect
Step 6 — Publish the app (required before use):
🔑 This step is essential. Without publishing, no one (including yourself) can find or chat with the bot.
- Go to Lark/Feishu Admin Console → Applications
- Find your app → click Publish
- For a self-built app in development, you can also use Version management → Create version → Submit for internal testing — this lets you and your team test immediately without full publication
Step 7 — Find and chat with your bot:
Once published, open Lark/Feishu and search for your bot's name:
- In Lark/Feishu, click the + (new chat) button → Search for your bot name
- Click the bot → start chatting
💡 Your bot only responds to messages sent directly to it — it won't respond to messages in group chats unless someone @mentions it.
DingTalk
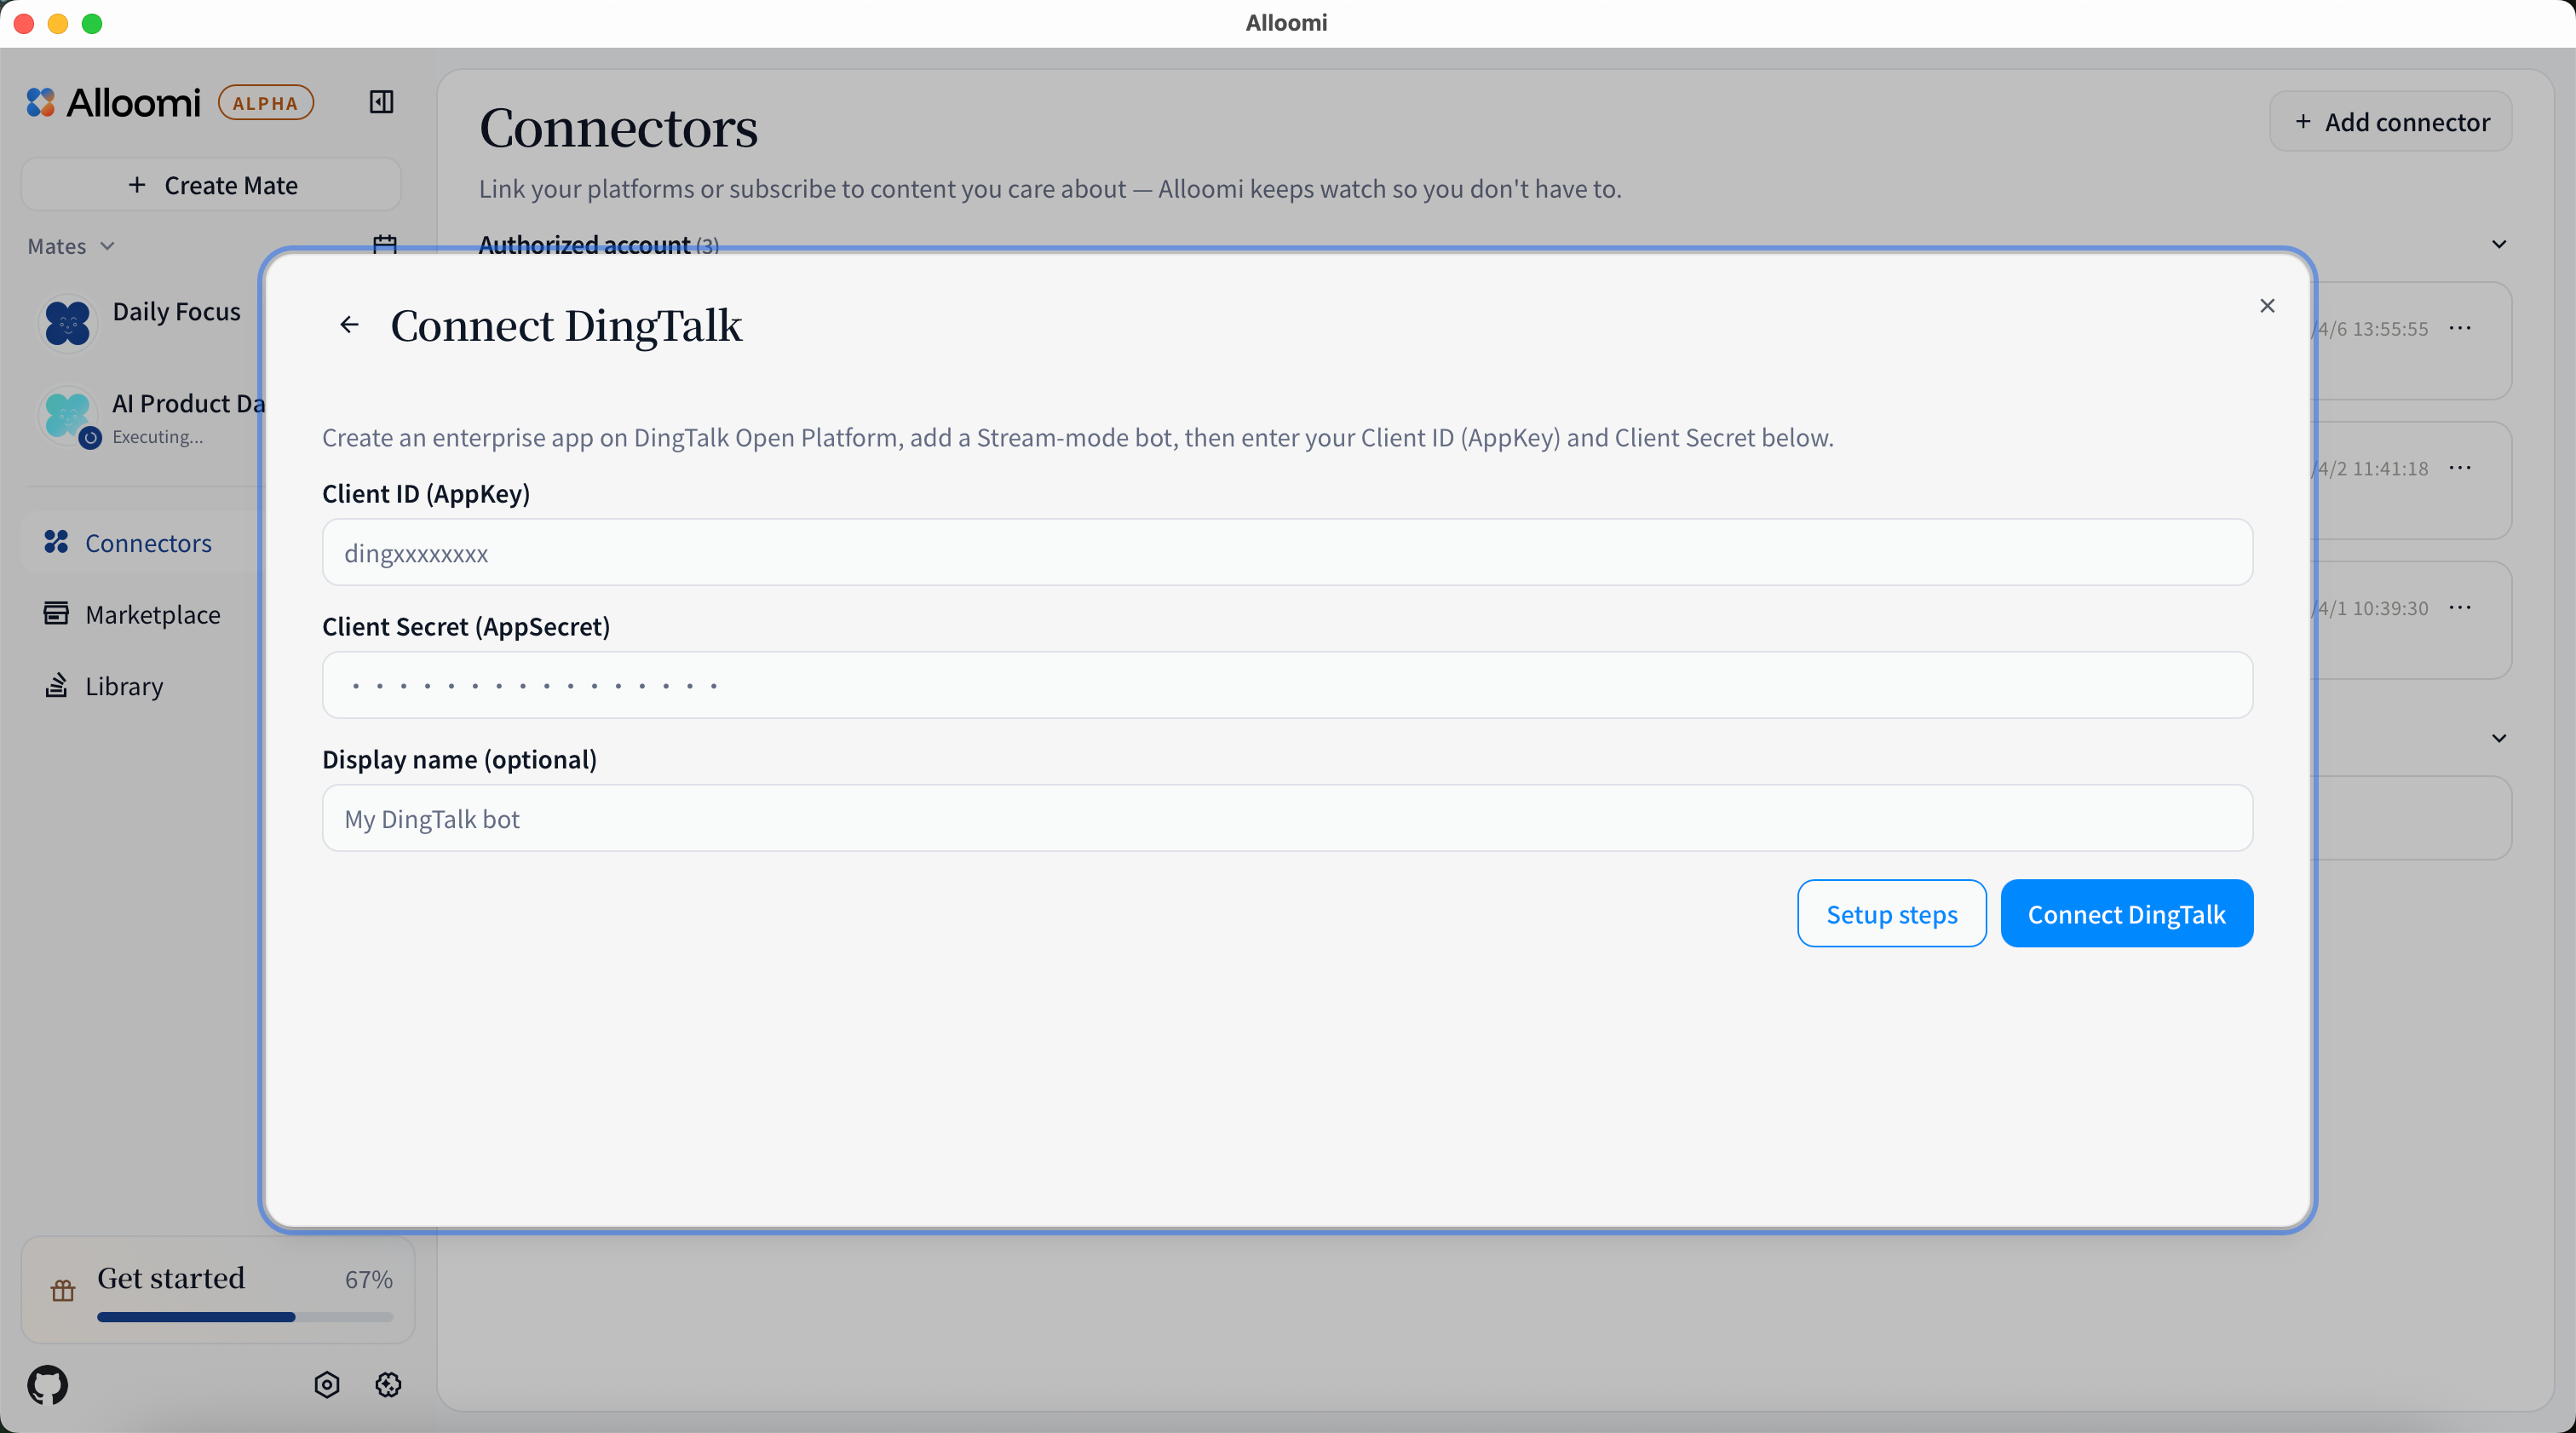
DingTalk integration uses a Stream mode bot — a long-lived WebSocket connection with no public IP or domain required.
Before you start — set up a DingTalk app:
- Go to DingTalk Open Platform and sign in
- Create an enterprise internal app
- Add the Bot capability and choose Stream mode (long connection)
- Obtain your Client ID (AppKey) and Client Secret (AppSecret)
Connect in OpenLoomi:
- Click + Add New Connector and select DingTalk
- Enter your Client ID (AppKey) and Client Secret (AppSecret)
- Optionally set a display name for your bot
- Click Connect — OpenLoomi establishes a long-lived WebSocket connection to your bot
💡 Stream mode means OpenLoomi connects directly via WebSocket — no server or domain setup needed. Once connected, you can chat with your bot directly in DingTalk.
Weixin
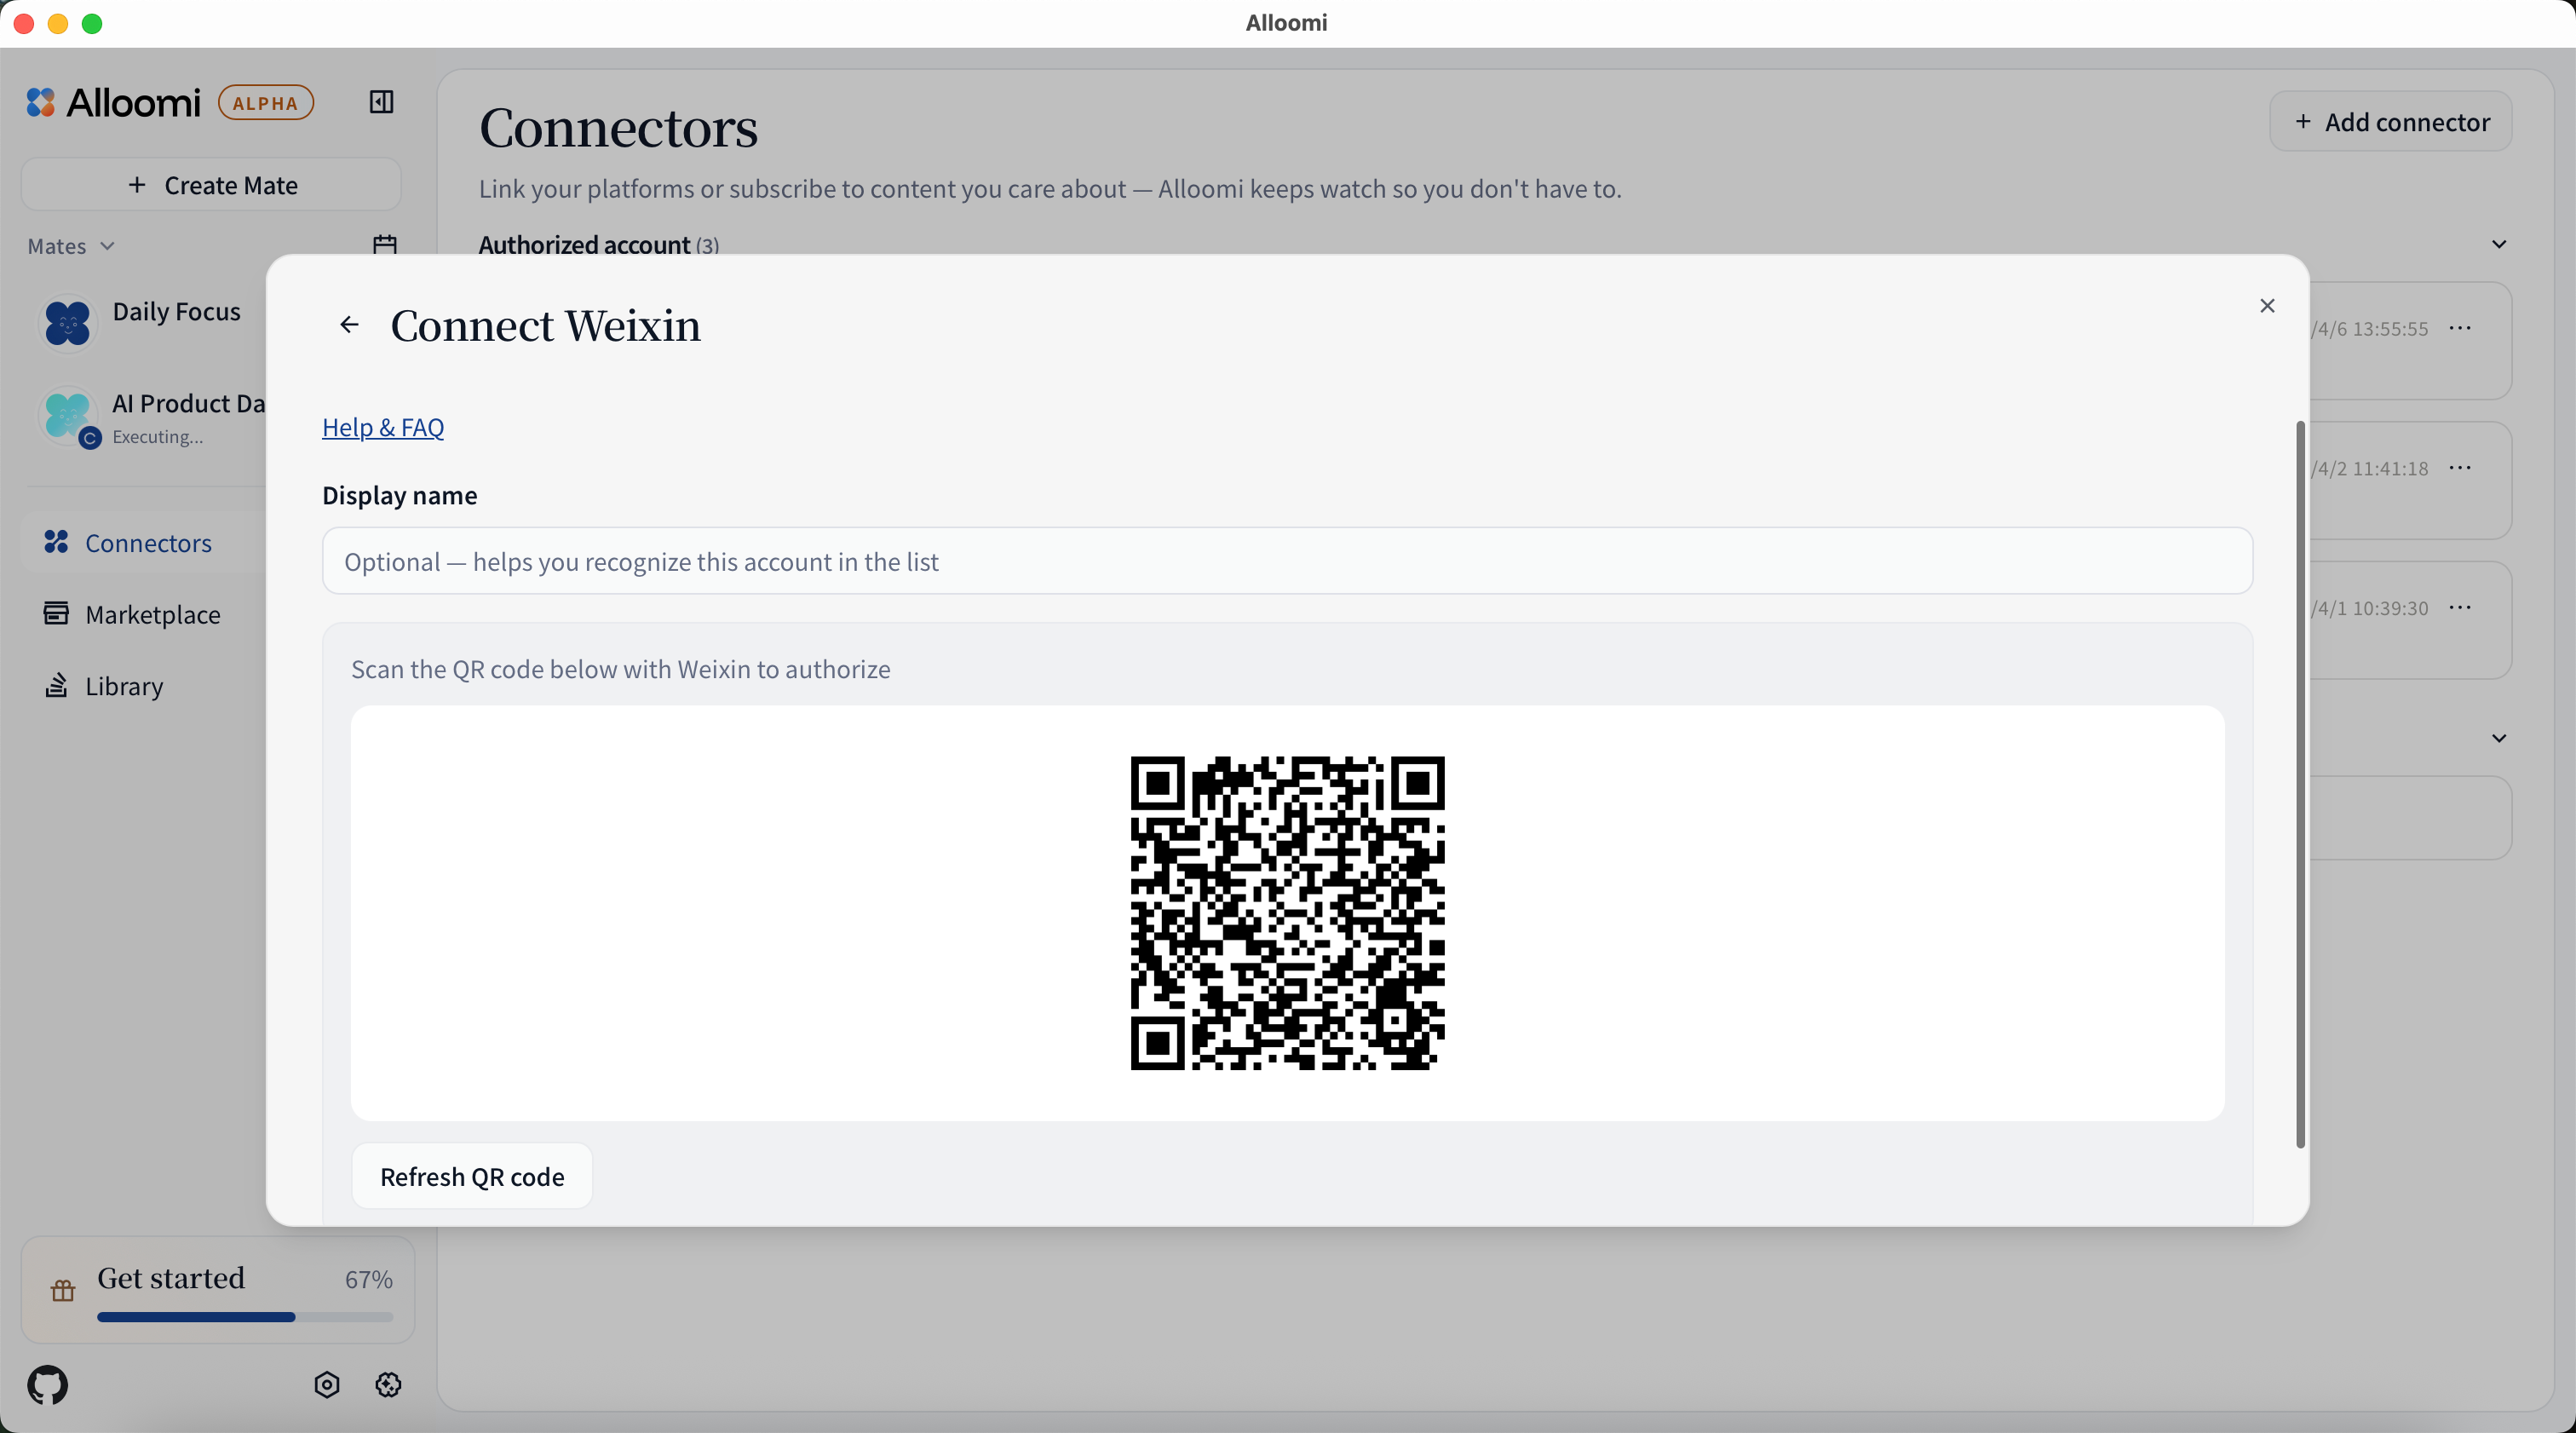
After clicking [Connect Weixin], scan the QR code in the Weixin app to complete authorization.
Gmail
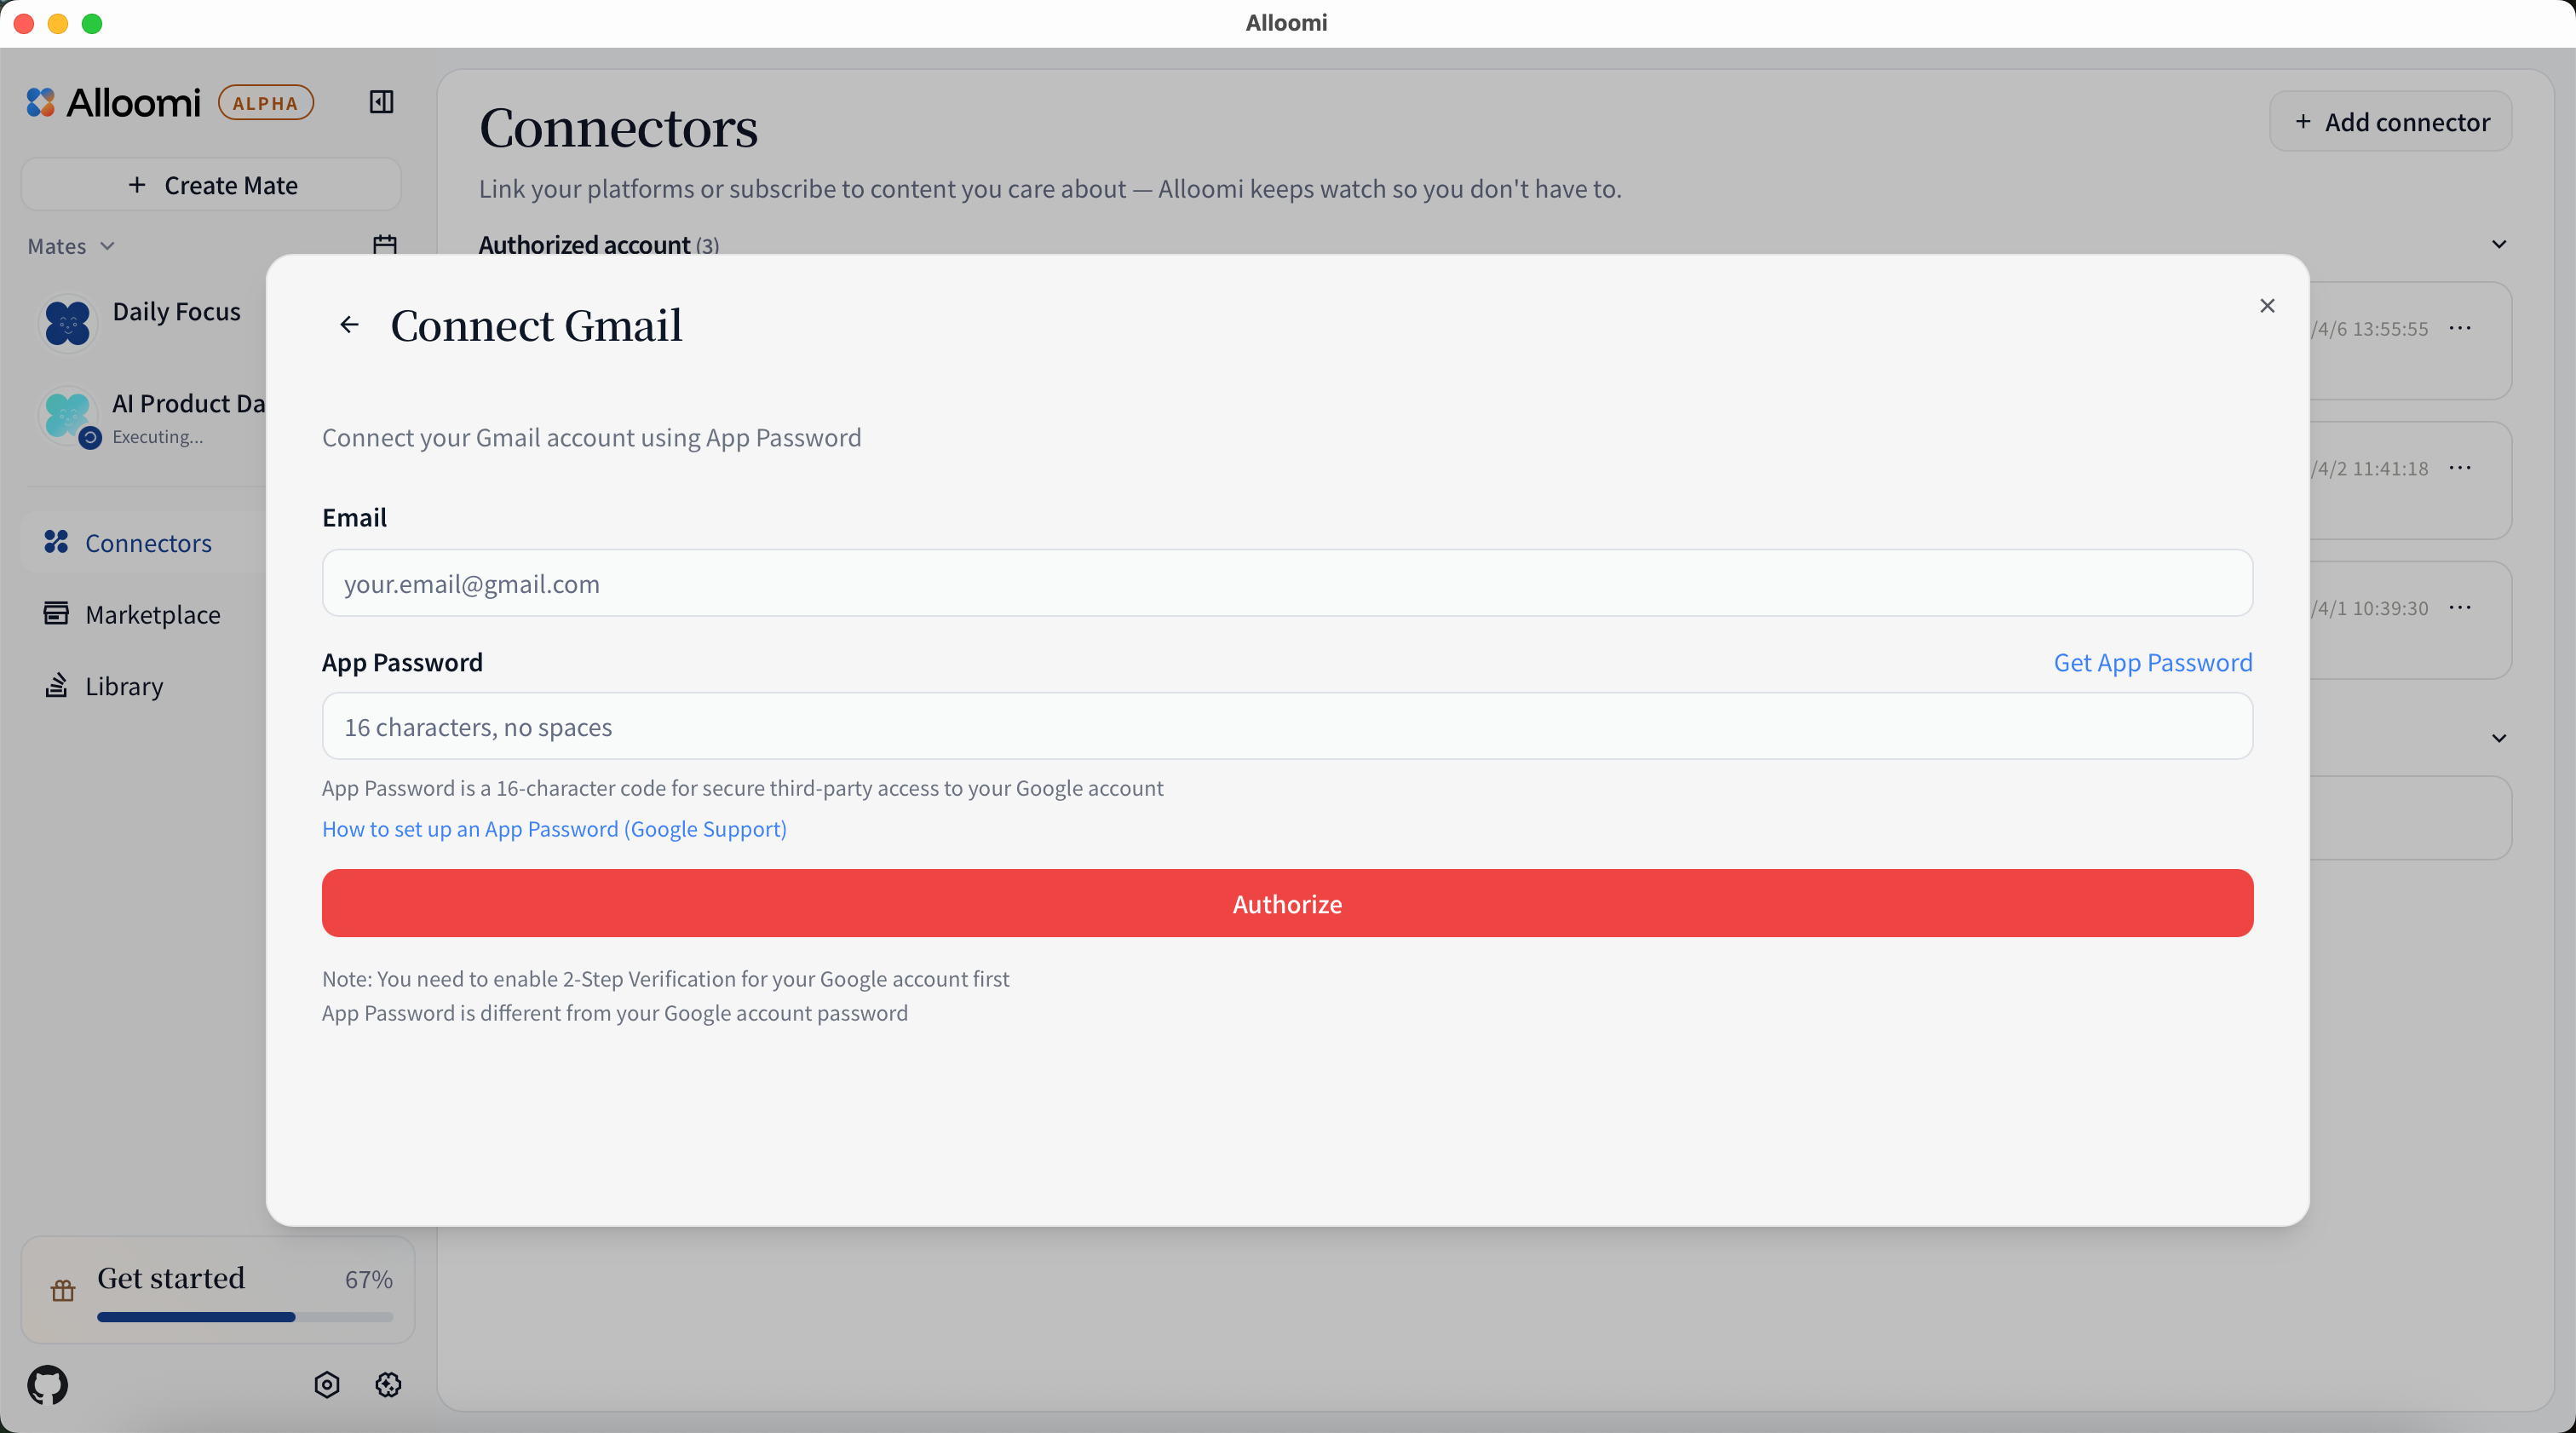
After clicking [Connect Gmail], enter your email address and an App Password to authorize. (Regular Gmail password won't work — App Passwords require 2-Step Verification to be enabled.)
Outlook
After clicking [Connect Outlook], enter your email address and app password to authorize.
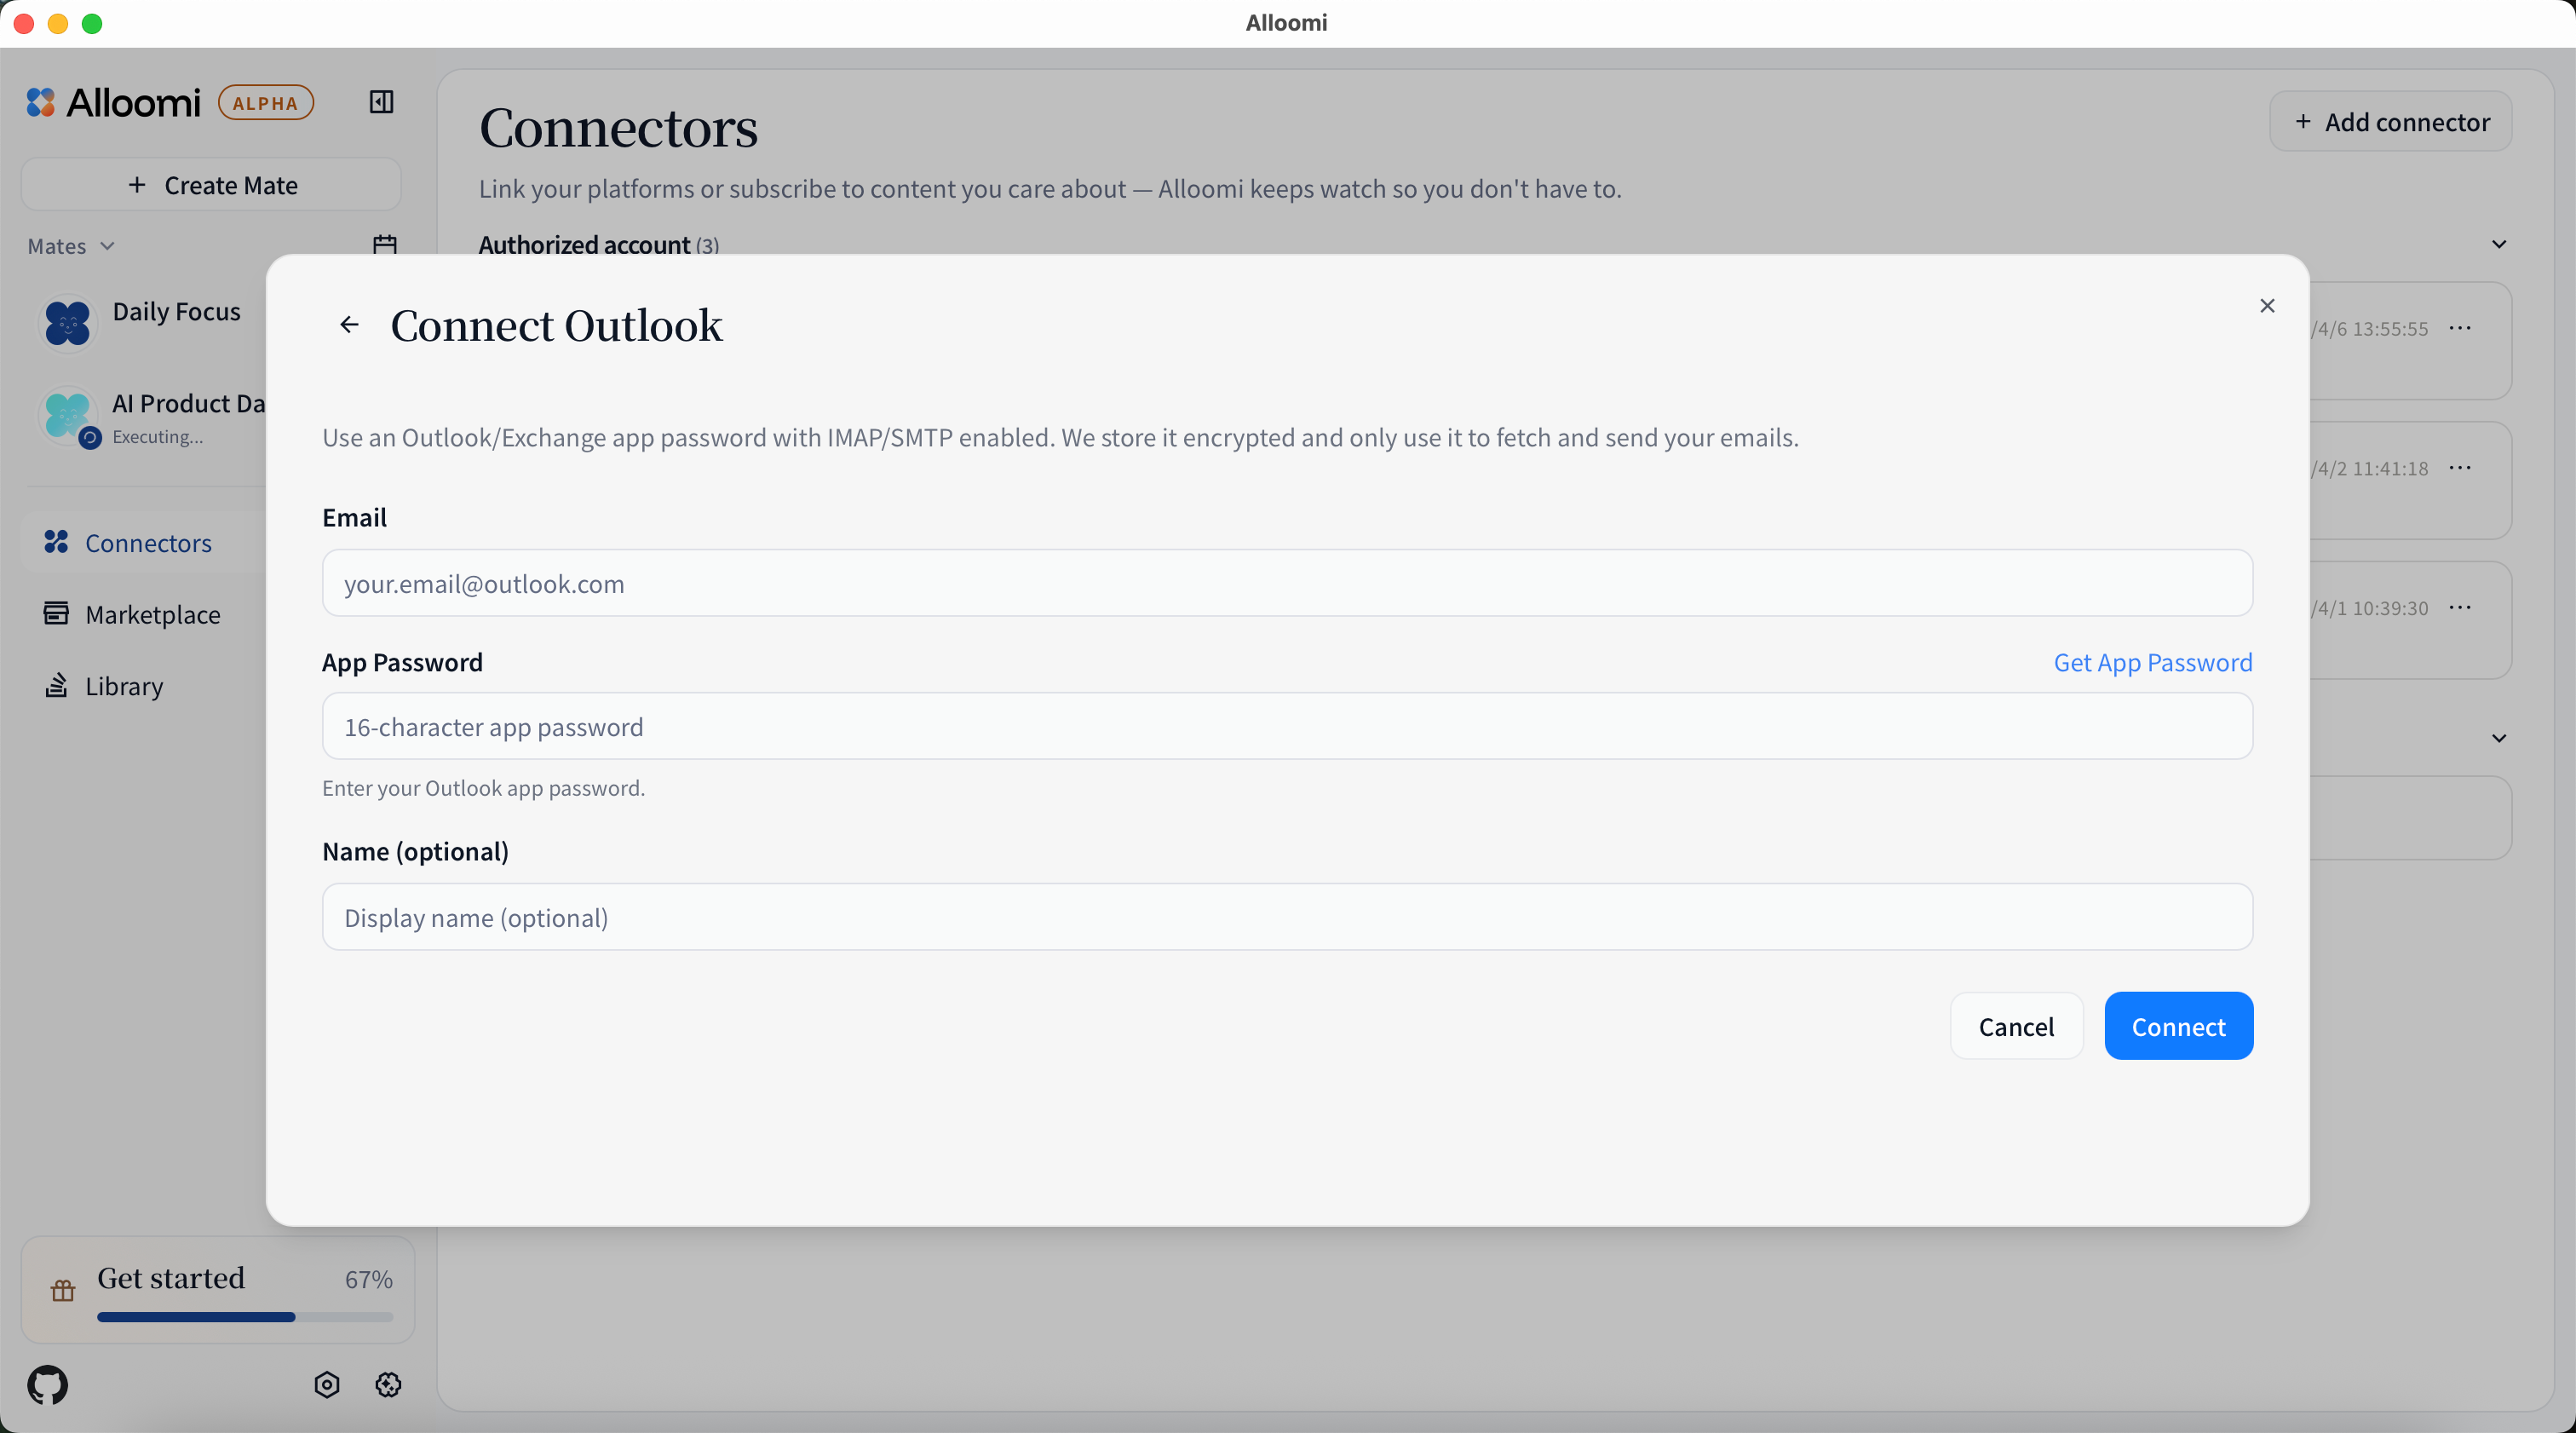
ℹ️ Slack, Discord, X, GitHub, Notion, Linear, and several other platforms are listed in the Add Connector dialog but are currently disabled. The platform setup flows above cover only the platforms that are wired up in this build.
Disconnect / Revoke Access
If you no longer want OpenLoomi to access a connected platform, you can disconnect it at any time.
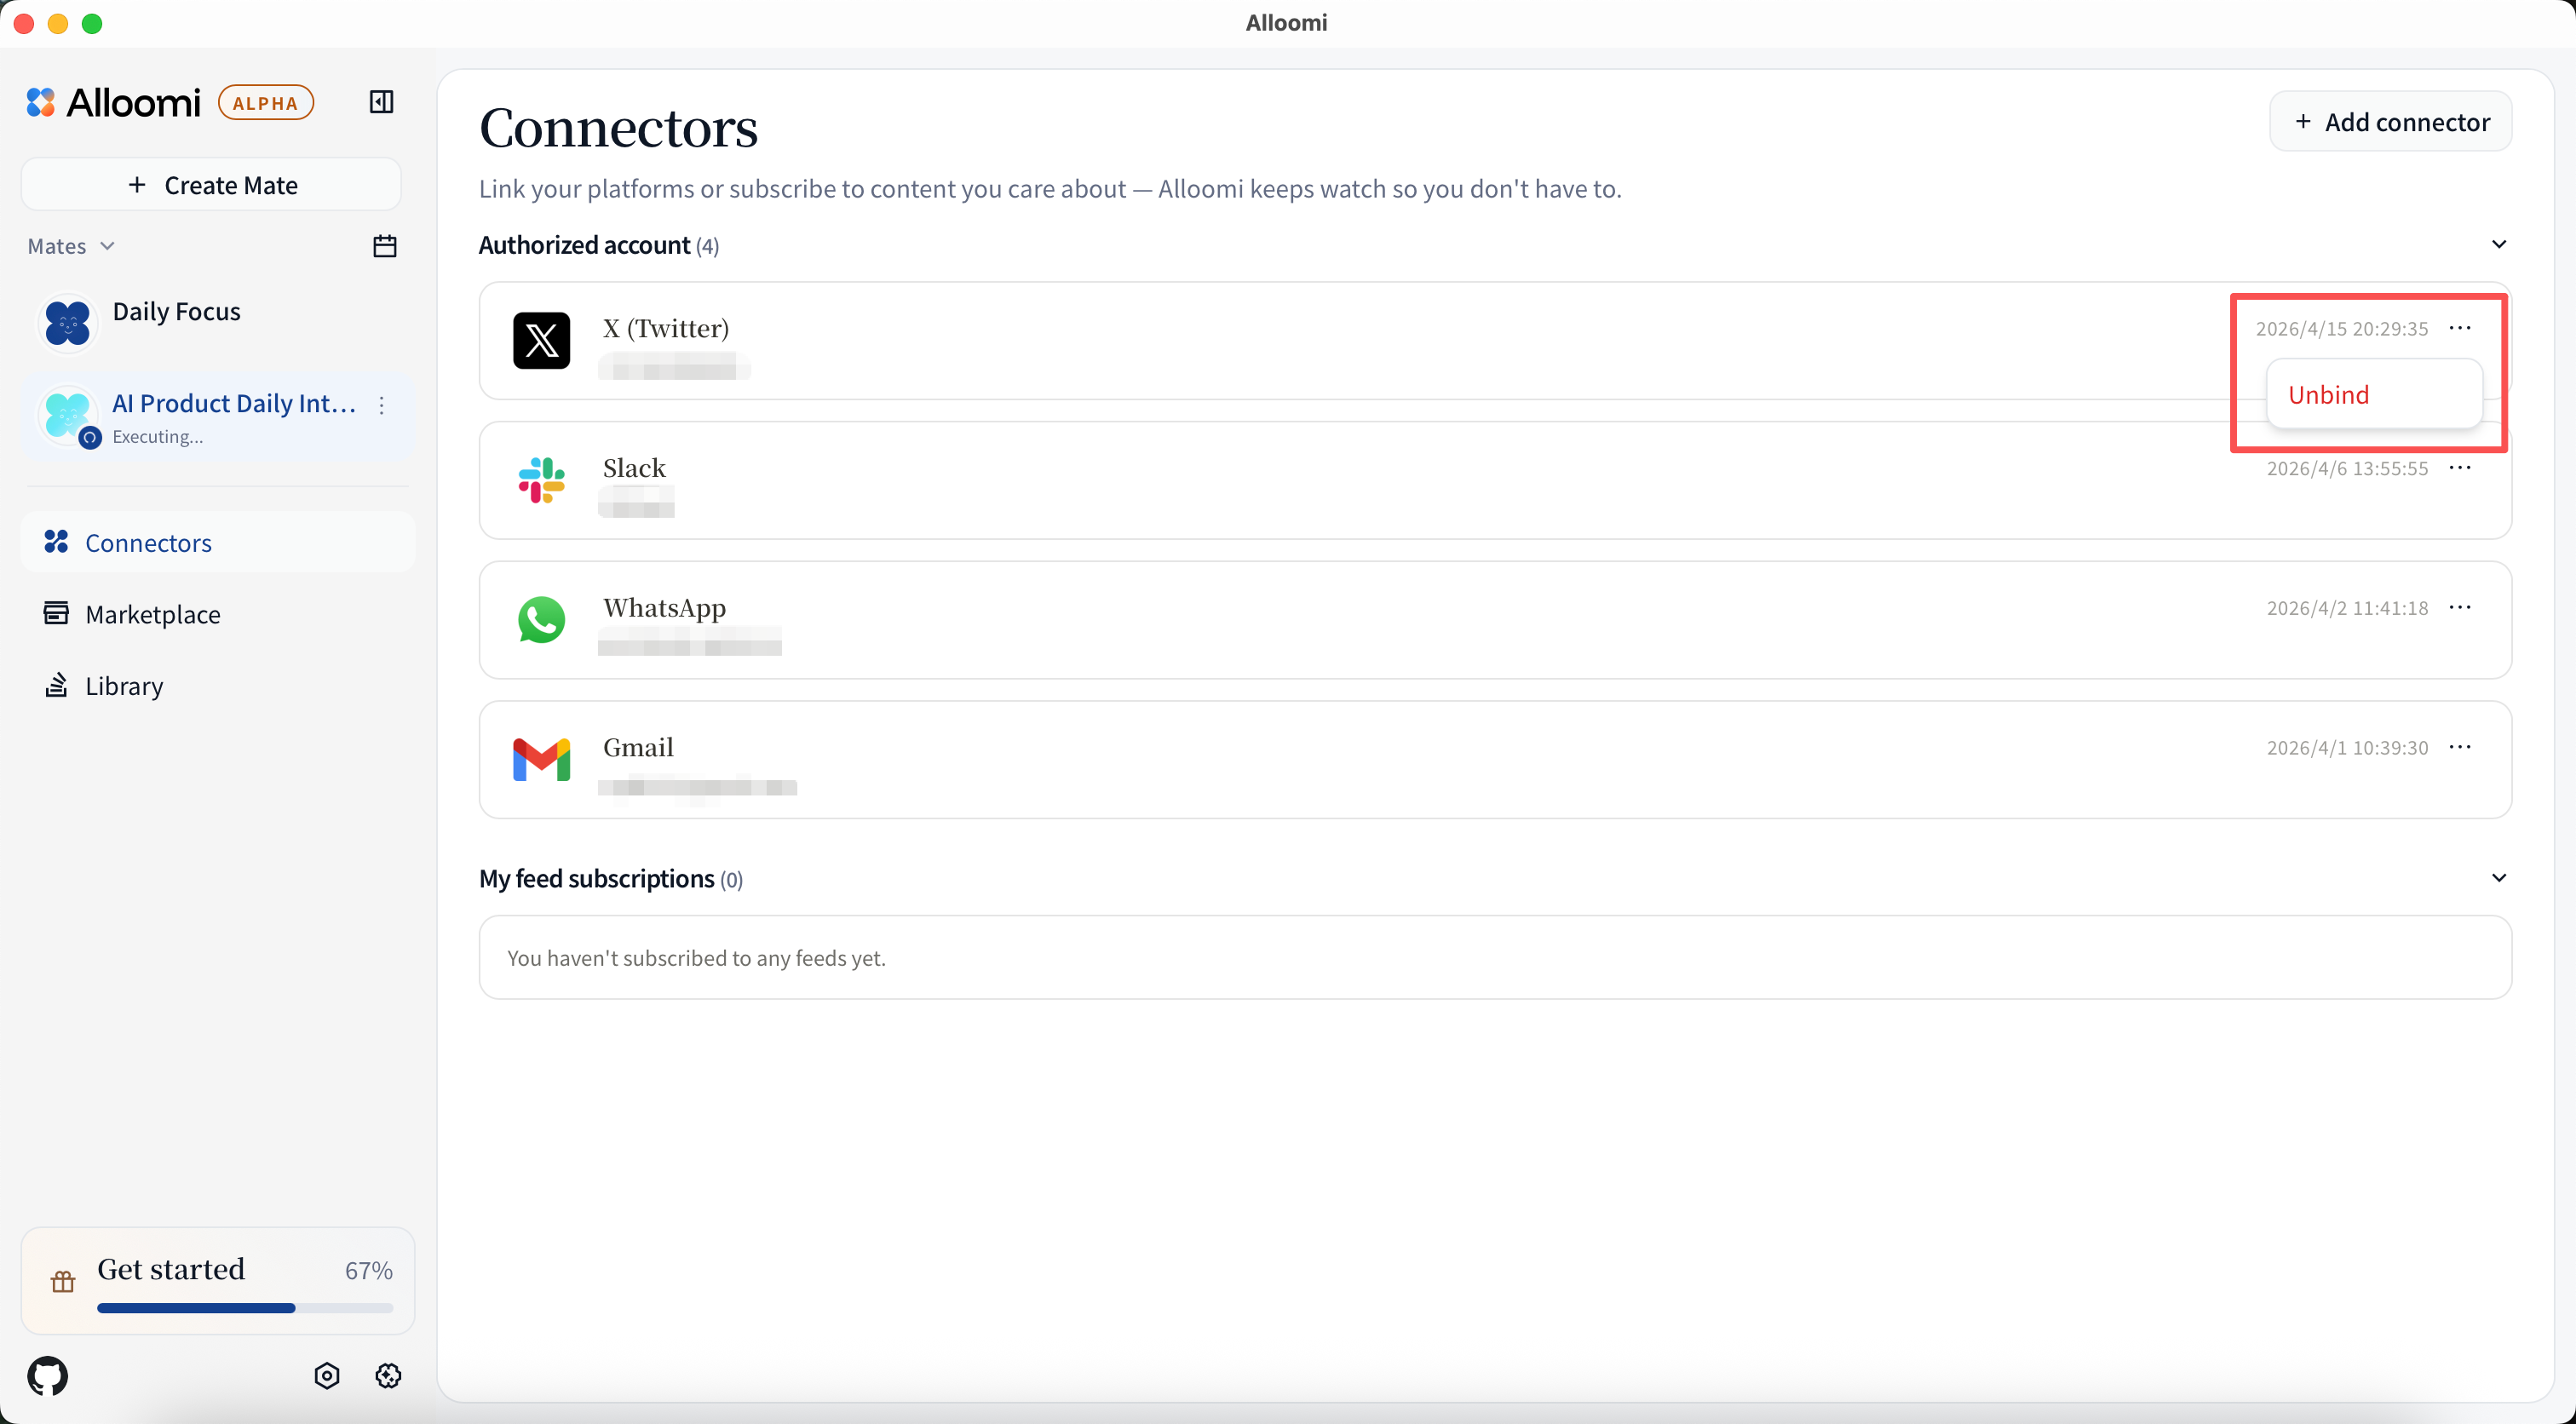
- Go to Settings → Connectors
- Find the platform you want to disconnect
- Click [Disconnect] or the remove (×) button
- Confirm the action
Once disconnected:
- OpenLoomi will immediately stop reading new messages from that platform
- Previously synced data is retained until manually deleted
- You can reconnect at any time by repeating the connection steps
💡 Tip: Before disconnecting, review what data has been synced in the Privacy & Security settings.
Verify
- The connector appears in Settings → Connectors with status Connected.
- For bot-token connectors (Feishu, DingTalk, QQ), sending a message to your bot returns a reply within a few seconds.
- For QR / phone connectors (Telegram, WhatsApp), sending a message to your own Saved Messages / 自聊 returns an AI reply in the same thread.
Troubleshooting
- Authorization never completes. The Composio flow opens in your system browser — if popup blockers are blocking it, allow popups for
127.0.0.1(or your configured callback host). - Bot doesn't appear in group chat. Confirm the bot was added to the group and that your message @mentions it; the bot only reacts to mentions, not to all group traffic.
- iMessage connector stays disconnected. Verify Full Disk Access and Automation permissions in System Settings → Privacy & Security, then restart the app.
- Gmail / Outlook rejects the password. App Passwords require 2-Step Verification to be enabled on the Google / Microsoft account first.
Related
- Messaging Apps — how the messaging connectors differ from Composio flows
- Loop — consumes Signals produced by these connectors
- Memory — where connector messages land after ingestion
- Privacy & Security — what data each connector can see
- Getting Started — install + first run